
When I first took the old lady out for a ride I found that her clutch was dragging badly.
When you are setting the clutch up, the individual clutch spring tensions are adjusted until you get an even “lift” when the handlebar lever is operated and when I initially set this one up I had problems getting the spring plate to lift evenly.
As the springs are all identical then the amount their adjuster are screwed in by should be fairly close to each other and these were not.
This indicates that the springs are “tired” and should be replaced so I got a set sent up from the Owners Club spares scheme.
To fit them requires a bit of dismantling, on late models there is a separate dome cover over the clutch and to work on the clutch you just need to remove that but life is not so easy on the pre-war machines.
With these you need to remove the complete outer primary chaincase, to remove that you need to remove the footrest and to remove that the exhaust syatem on that side has to come off!.

Primary Drive
Once the primary case is removed you have access to the clutch and the springs.
There are five springs in the Panther clutch, each fitting into a spring cup in the clutch face-plate and secured in place by a sleeve nut with a screwdriver slot in it.
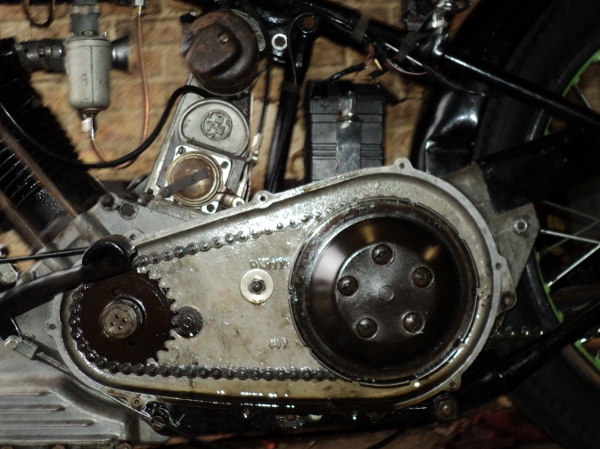
Clutch Exposed
I unscrewed one of these sleeve nuts, removed the spring and compared it against one of the new springs and found the old spring was noticeably shorter, it must have “settled” a bit over the years.
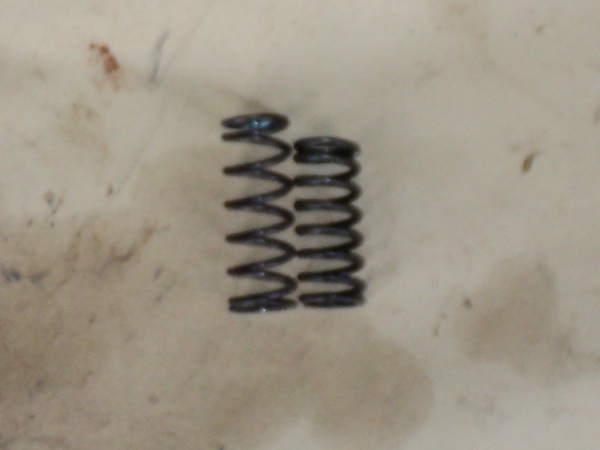
New and Old Springs Compared
Then it was merely a case of putting the new spring in the spring cup and fitting the sleeve nut, sounds easy but it’s not due to the spring pressure.
Since the adjusters are a sleeve nut rather than a screw you need a special screwdriver with a gap in the blade to allow for the stud that the sleeve nut screws onto.
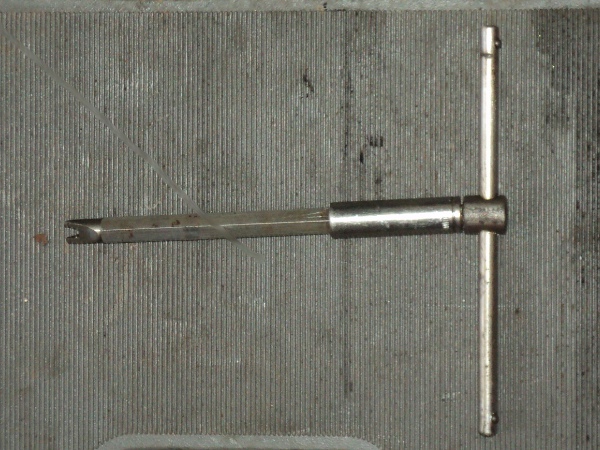
Spring Adjuster Tool
This shows the tool I used, it’s made from a bit of 1/2inch hexagon bar with a 1/4inch hole drilled down the middle and the end ground into a screwdriver blade.
By fitting it into a socket on a “T”-bar I can put an even pressure on the springs and turn the sleeve nut to engage it with the threads on the stud.
The springs were replaced one at a time and then all were tightened down till they were solidly coil bound.
They were then each turned back by four complete turns to give the base setting.
The clutch was then operated several times to settle the springs in their positions and then operated while watching the face-plate lifting.
The springs were then individually adjusted until the plate was lifting straight and even.
As on this occasion there was no need to replace any of the clutch plates there was no need to reset the free play in the clutch cable but if I had renewed the friction plates this adjustment would have been needed.
The effect of new, thicker, plates is to increase the free play in the system and there are two ways to adjust this out.
The obvious way is using the cable adjuster where the cable enters the gearbox but this is limited and there is also another adjustment on the internal lever inside the gearbox.
This adjuster is to be found under the small cover seen here by the kick-start lever.
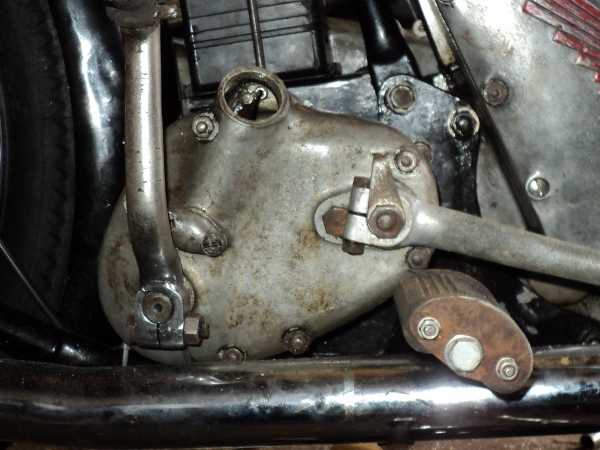
Fulcrum Adjuster Cap
This cover is held in place by two screws, once these are removed the cover can be lifted off revealing an adjuster nut which alters the fulcrum point of the internal lever.

Fulcrum Adjuster Nut
Since the underside of the cover is recessed to fit the adjuster nut, the simplest way to adjust this nut is using the cover to turn it.
However the cover must be screwed firmly in place before you can operate the clutch as it is the anchor point for the fulcrum.