Monthly Archives: May 2019

Lights On – Again

Now that I’ve taken the sidecar off the Panther I can again ride her as a solo.

First time out felt a bit strange, probably because it’s been on sidecar for a while and the tyres will have worn to suit a sidecar outfit.

Since it’s only been for around 1500 miles they’ll soon wear back to suit a solo so that’s no real problem, especially as she will not be used as a performance machine.

Once I got back home I realised that the headlamp was not working, in fact none of the electrics were!.

First thoughts were that I’d managed to blow the main fuse but a quick look showed that this was not so, and then I saw that the stop light was still working.

This showed that the battery was still charged and its connections were sound.

But the stop-light is not fed from the headlamp area, it has its own feed from the battery, so suspicion fell onto the wiring and it was out with the multimeter.

The wiring system on this old lady is laughably simple when compared with that on a modern machine.

There is a wire runs between the battery and the ammeter.

Another wire runs between the regulator and the main switch.

One runs from the switch back to feed the rear light and then I’ve added an extra one from the headlamp shell to the frame ground point and that’s the main fore and aft loom!.

There is in addition a connection between the ammeter and the main switch and then there’s the wiring going to the headlamp itself plus that to the speedometer bulbs and to the horn.

The headlamp is normally grounded through the frame of the bike but since I had added a grounding wire as a back-up, suspicion was on the battery lead to ammeter wire.

I used the multimeter to test between the ammeter and the headlamp shell and sure enough there was no power showing.

Suspect point was where the loom flexes as it exits from under the fuel tank and crosses to the headlamp shell.

Normally there would be only a small amount of movement here but I’ve had a sidecar fitted, this means that as with a sidecar fitted you actually steer by turning the bars there is much more movement, and hence flexing of the loom here.

Sure enough, I could feel a break in one of the wires here and so decided to splice in a new section of wire.

This meant taking the tank off to get access, so it had to be drained!, typically I’d just tanked up, luckily only to half-full!.

I opened up the loom at the break to find the wire had totally parted and so I pulled that wire out of the loom further back to under the tank to make a splice.

Until now I’d assumed it was the main battery feed wire forward had parted but it turned out to be the additional grounding wire I’d added! Shows how unreliable a frame ground can be!.

To be safe I checked by running a temporary ground wire from the headlamp to battery ground and – Lo and Behold everything worked!.

This made life much easier as the ground point inside the headlamp is much simpler to reach than the power point!.

Rather than just bridging the break I ran the new wire from the splice point under the tank direct to the headlamp ground, this meant I only had the one splice in the wire, less potential for problems!.

A swift check of the system again and everything was working so it was just putting things back together, add fuel and we were back on the road.

A Further Update

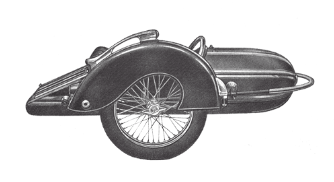
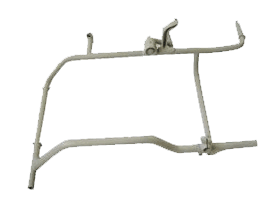
I’ve had the R12 out a couple of times now and so it’s time to think of the sidecar. As I’ve said before this is a composite of a Steib S350 body on a Steib LS200 chassis

Steib LS 200 Chassis

Steib S350 Sidecar

First thing is lights!.

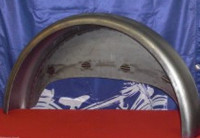
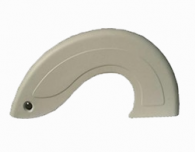
I can’t just swap the mudguard from the Panther’s chassis over, although this would be the simplest way, because the guard mounting systems are totally different, and anyway the LS 200 chassis is a Steib and so has the “art deco” flared guard rather than the old style half-circle guard.

Old Style Mudguard
Steib Sidecar Mudguard

The guard I have for it is a fibre-glass reproduction so the lamps on it need to be independently eatrthed, and then I’ve to fit indicators as well.

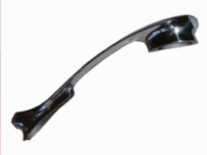
On a Steib the sidecar lights are built into the grab handle on the mudguard.

Steib Grab Handle

There is a tunnel cast into this handle that normally only carries a single wire forward to connect between the front and rear lights, power being fed into the handle by a hole through the guard at the rear mount.

This tunnel now carries the power leads for both the front light and the indicator as well as an earth lead, the leads to the indicator carrying on through the guard at the front mount of the grab handle.

For the indicators I’ve used a smaller version of the mounts I made for the Panther chassis, 2 inch diameter tube rather than 2½ inch and fitted with amber LED units sourced from the Internet.

New Indicator Units

I’ve changed to using LED bulbs in the grab handle as well and I’m using a stop/tail in the rear light.

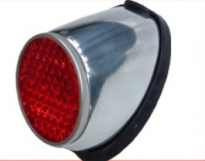
Also, since the standard Steib rear light is rather small I’ve fitted an LED light into the rear reflector unit, so converting it into another rear light.

Steib Rear Reflector

This all means that now there is now a 4 wire loom leaving the mudguard to connect to the bike rather than the original single wire.

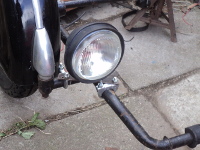
I’m also fitting a spotlight onto the chassis in front of the mudguard. This is also fitted with an LED bulb and is meant to act as both a DRL and as a running light.

Spotlight cum DRL

I’ve had to be a bit crafty here.

My R12 was built back in 1940 and her generator is of rather limited output, nominally of 6 Volts and all of 36 Watts!.

As standard on 6 volt electrics it would balance the lighting load of a solo machine and still have a little in hand to keep up the battery, but with a sidecar fitted there’s no leeway at all.

While I have converted the dynamo to give 12 volts output using a modern electronic regulator, which does help a lot, full lights on all the time are not really feasible, although the use of LED lights does help a bit.

So what I’ve done is to wire the spotlamp and the pilot bulb to work separately from the main lights, worked with a separate switch on the ‘bars, and I’ve fitted a 10 watt Halogen bulb in the pilot position as well.

The crafty is that there is also a feed from the sidecar running lights to the spotlight so that it will come on with the normal lights as well, I’m running with a right-hand sidecar in UK where the Rule of the Road is to drive on the left so I want a large front light on the sidecar side.

Problem is that doing this has power back-feeding both ways so with the lights switched off but the DRLs on the other lights come on as well so to counter this both feeds to the spotlight now go through diodes, as does the feed to the pilot light.

This means that I can now have two bright white lights showing to the front in daylight hours with only a small load on the generator but this extra load is not there when the main lights are on – so now, with the spotlight, there are 5 wires to connect between the bike and sidecar.

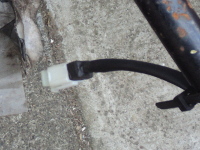
Traditionally this would be done using a nest of bullet connectors but I’ve opted for the neater way of using a 6-way “mini-connector”, as is used in a modern bike’s cable loom, with a feed for the other indicator in the 6th position.

This is because the R12 will comfortably be able to tow my lightweight box trailer and of course that means I need to feed all the trailers lights and indicators.

6-Way Connector

The trailer will make life easier when going on a camping event, my two dogs travelling in the sidecar and the gear in the trailer.

= = = = = = = = = = = = = = = == = = = = = = = = =

For any of you who want to tell me that LED lights are not legal to use on the roads I’ll point out that this bike was built in 1940 and so comes under the old regs.

These only ask for “A white light to the front and a red light to the rear” and do not ask for a kitemark or “E” numbers on the lights. After all people were still using acetylene gas lights on vehicles back then :^)}.