The new rim for the front wheel has now arrived and I’ve picked it up from John at North-East Wheelbuilders.
As I’ve got to paint the centre of the rim before it’s built I’ve scrounged an old chrome rim from him as well so I’ve something to practice on.
Big problem is that paint will not “key” well onto chrome plate so I’ve to strip that part of the rim clean before I start.
I’ve had a rummage around on the ‘net and found an article in ”Wikipedia” saying that application of a “foaming oven cleaner” will do the trick so I’m going to mask off the rim side beads on the extra rim so as to leave only the central “spoke well” clear and give it a try.
As oven cleaner is pretty savage stuff I’m not going to rely on paper masking tape though but will try it with plastic electricians tape rather.
Instructions are to apply the cleaner, leave it for 10 minutes and then rub the plating off so I’ll just have to give it a try.
All I really need to do is to get the chrome layer off as even if it is a “three layer” plated rim (which I doubt these days) the etch primer will bite onto the nickel underlayer and if it has just been flashed straight onto steel then there will be no problem there.
_____________________________
Well, the oven cleaner was not the success I hoped for, it had no noticeable effect.
In case the removal was not noticeable, after all the chrome layer is only microns thick, I tried the old rim where the oven cleaner had been with some carborundum paper, the old faithful “Wet and Dry” and found no noticeable difference in “scratchability” between there and some untreated chrome.
So it’s been down to the hard way, rubbing out the rim centre by hand with 240 grit “Wet and Dry”, used dry and carefully cutting only as far as the edges of the rim flanges. A laborious, time-consuming but not difficult job, one that’s left me with cramped and blackened fingers though.
I’ve now masked off the flanges and just have to prime and paint the rim centre.
A rim centre is not the easiest of things to paint and I’ve come up with an idea how to do it.
What’s intended is that the rim will be slung so it lies horizontaly and this means that I can get the spray gun up into the centre of the rim and spray horizontally onto the rim centre.
By winding the rim round a few turns and then releasing it the rim will spin as the supension cords unwind and all I need to do is hold the gun steady and spray to get an even coating!
That’s the theory anyway, thing is “Will it work in practice”?.
____________________________________
Next Day
The answer is “Yes”.
I slung the rim from the roof on 4 cords to S-hooks in vent holes in the edge of the rim. While these holes were symetrically spaced they were not at 90 degrees to each other, as you can see in the picture, but they were far enough apart that the suspended rim was stable.
I wound the rim back a few turns and let it go, watching to make sure it spun level and once I was happy with it I wound it back up again, let it start spinning and began to spray with the etch primer.
Coverage was even but less than I expected so it took a couple of runs to get a satisfactory first coat.
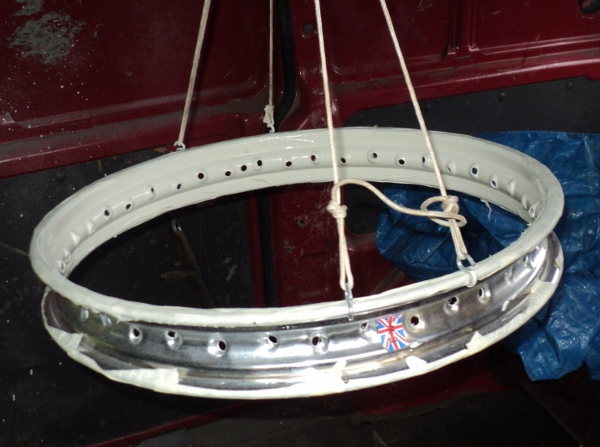
- Rim as suspended for spraying
Two hours later it was given a second coat and then left overnight for the primer to cure.
Now it was an inspection job as to how well the primer had gone on and a couple of “touches” with the Wet and Dry to clear blemishes.
Once I was happy with the results I reslung the rim, spun it up and applied the first of the top coats.
An hour later that coat was dry so on went another, followed in due time by two layers of clearcoat lacquer.
The last lacquer coat was allowed to dry out a bit but before it had hardened the masking was stripped off the sides of the wheel, the idea being that as the last coat had not yet hardened the sharp edges left by the removal of the masking tape would “flow out” a bit and give a smoother edge to the central painted strip.
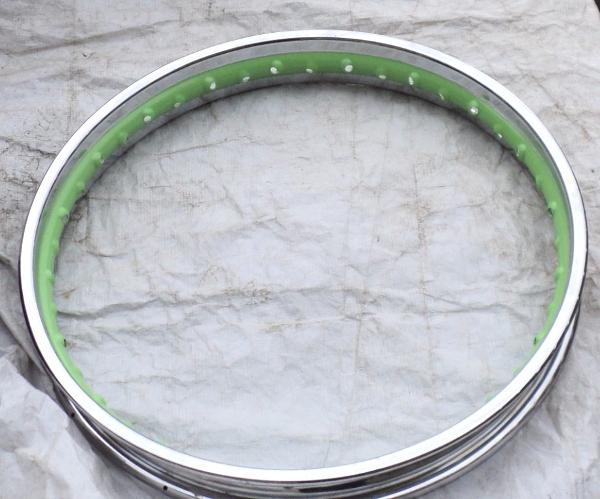
Painted Rim
It still has to have coachlines run down the junction between the painted centre and the chromed flange either side but they’ll be easier to do once the wheel is built up.
Now it’s just left for me to take the rim to John and get the wheel built, apply the coachlines, shove a tyre onto the rim and that’s that, then I’ll have to get the back one done.