
It’s now time to start fitting the sidecar. I’ve not yet refitted the tank after the dynamo belt drive conversion so now is an ideal time to do this.
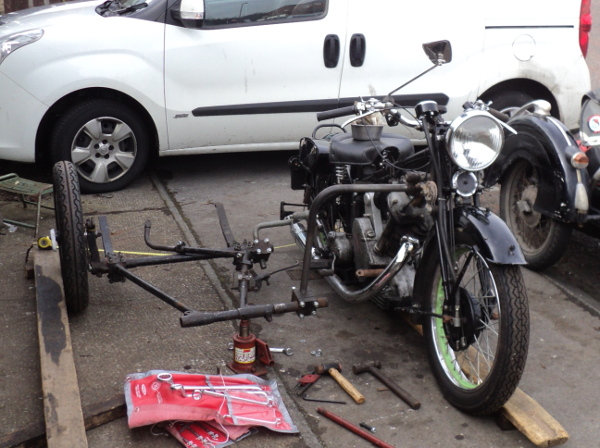
First thing is to get the chassis connected up to the bikes frame.
The chassis was laid out alongside the bike and put up on blocks.
The front swan-neck was put in position on the bike and loosely clamped to the sidecar chassis, as was the rear ball joint fitting.
Fitting a sidecar has been described as a black art, well now starts the black magic!
First thing to set is the lead, the sidecar wheel has to be set a bit in front of the bikes rear one, how much depends on the type of sidecar, the intended use and the bike itself.
A bike with rear suspension needs more lead than a rigid bike; with a heavy sidecar you needs less lead, with a light sports chair you need more. This all boils down to the answer to “How Much?” being “It Depends” but it is not critical to a fraction of an inch, I’m starting with 6 inches of lead on a light sports sidecar and this can be adjusted, if needs be, after road test. On my later outfit, which does have rear springing, I’m running with 10 inches lead on a similar sidecar.
So the chassis was slid around on the blocks till I had the appropriate lead and the fitting clamps tightened a bit.
Lead and level have been set, now it’s the toe-in to do. Notice the two “fine alignment tools” by the front wheel
The chassis was now able to have the support blocks removed and, as the bike was now standing on her wheels as well, it was time to level the chassis.
Working with a rigid bike here it was set level side to side, when the bike has rear suspension you’ll need to have the bike loaded when setting this.
While you want the sidecar level side to side, going fore and aft you want it nose high, even when loaded, so the chassis needs setting with the nose rail between a half inch and an inch higher than the axle rail. Getting these right can be a bit fiddly as with the chassis I am using, adjusting the side to side level will also alter the lead if your not on top of the job.
Now comes the most important of the settings, the toe-in.
With a sidecar outfit, the power is all on the bike side, the sidecar wheel is unpowered.
This means that when running straight the sidecar wheel always drags a bit and tends to pull the bike towards it. It is not a heavy pull but it does get tiring compensating for it all the time, so the trick is to set the sidecar wheel to steer a little the other way by pointing it in towards the bike, to “toe it in”.
Thing is “By how much?” and the answer is “It all depends!”. This is the big variable and depends on the bike, the roads you use, road camber will affect it, how fast you are going etc. so you have to compromise and then make adjustments to suit.
Experience leads me to use an initial setting of around 3/4 of an inch over the length of the bike so a straight edge (here a length of 4 x 2 timber) is laid against the bikes wheels, I have the same size tyres fitted fore and aft so it’s set up on blocks and adjusted so as to touch evenly at four points across the wheels.
Similarly another straight edge is laid against the sidecar wheel, touching evenly against it and the distance between the two straight edges measured, first just behind the rear wheel and then just in front of the front one, the difference between the measurements giving the amount of toe-in.
This is adjusted to suit at the chassis clamps, the sidecar wheel being lifted off the ground and replaced and the straight edges reset before a check measurement is taken so as to remove any tyre distortion from the figure.
Once I had the required toe-in the two main sidecar clamps could be tightened up but this is another setting that will probably be modified after road test.
This left me with the sidecar lean out to set. The bike needs to lean a little way out from the sidecar. With a left-hand sidecar in UK you want the bike to be a little past vertical to allow for the road camber, so you drop a plumb line from the handlebar end and set the lean to around a half inch.

To set the lean-out drop a plumb line from the handlebar.
I’ve got a right-hand sidecar however and any lean I set will be added to by the camber, if I set too much lean I’m going to feel the bike leaning over, so initially I’m setting so as to have the bike vertical on a level surface so on the road the camber will be giving the lean out.
This is set using the rear upper brace, that one goes to just below the saddle.
Lean -out is set using the rear brace that goes to under the seat
That’s the main adjustments made and locked by tightening the chassis clamps. Some people will tell you these three fittings are all you need but a fourth one is definitely desirable, without it you can feel the outfit flexing in corners, not only that but the toe-in varies as the outfit flexes, Not Ideal!.
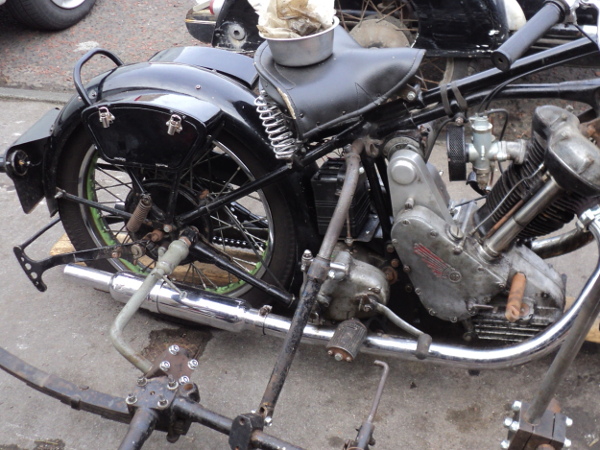
This fitting goes across between the front of the sidecar chassis and a low point on the bike to triangulate the swan neck. Normally you would take it off the front engine plates but a Panther does not have these.
However P&M supplied a mounting point on the engine right beside where the front engine supports are so its taken to there. All you do is adjust the fitting so that the clevis bolts slide easily into place and then lock it up in that position.
The lower front brace goes between the front of the chassis and the bike.
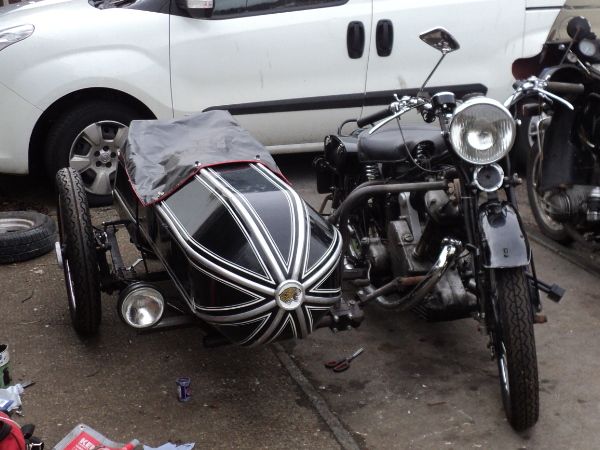
Once it is in place then the body can be fitted.
With the basic settings made it now requires a road test to determine what adjustments need to be made to these.
What to expect is that as you pull away there will be a small degree of low speed steering wobble that disappears as soon as you are moving. This is normal and you soon do not even notice it, you don’t after all on your car and it does the same. You can reduce this with a steering damper, but too heavy a damper makes for heavy steering, careful attention to the setting up will minimise it, a better remedy.
Now try some slow turns, towards and away from the sidecar, ideally the effort should be about the same but if turning towards the chair is noticeably heavy then you need to reduce the lead to stop the wheel crabbing. But too little lead affects stability and makes the sidecar wheel more prone to lifting.
Does the outfit run straight under steady power? The ideal is to be able to hold it steady with one finger on the bars, does it pull to one side or the other? This is a pointer to the toe-in setting, pulling all the time towards the sidecar — increase the toe-in, pulling away from it — decrease the toe-in.
Open the gas and as you speed up you should pull a little round towards the sidecar; now shut the gas,as the bike slows on engine braking you should feel the sidecar pull round towards the bike.
If at steady speed you can feel it is pulling only slightly but enough to need constant input to stay straight then a SMALL adjustment to the lean-out can help but don’t overdo it, look on this as a final fine trim to getting the toe-in right.
So far all your tests should have been below 30mph, now it’s time to speed up a bit.
Take it gently and try at higher speeds, it may need a bit more fine tuning to get the outfit handling “Just So” but it’s well worth the effort as with a well set up outfit out on the open road it steers largely on the throttle, needing very little input to the bars.
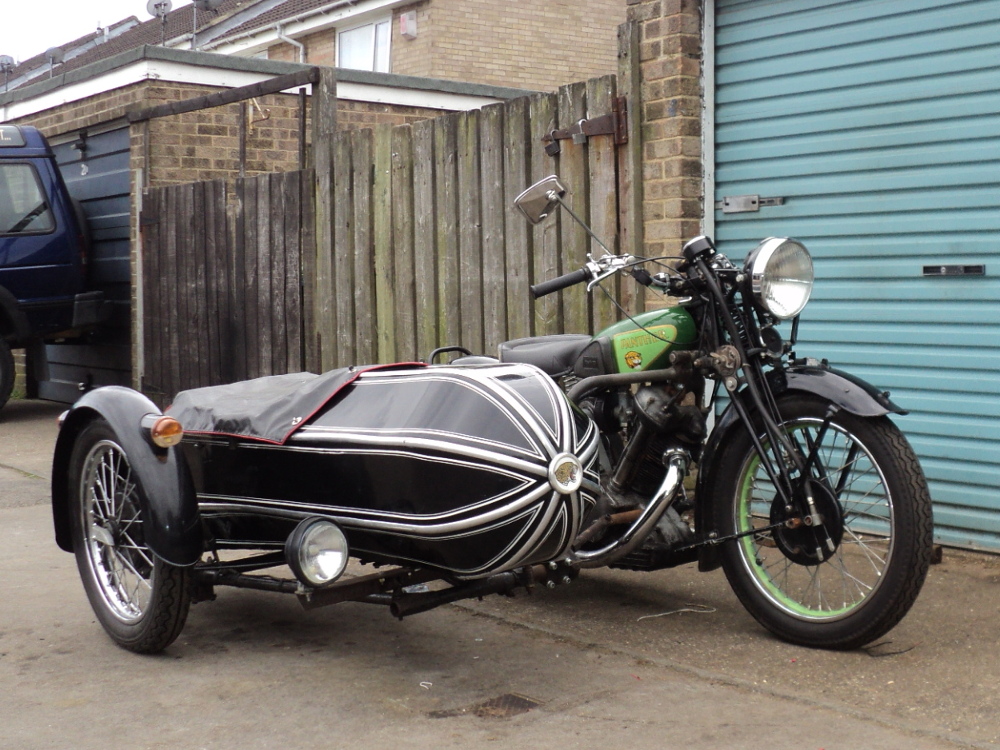
Final Result, ready for the road