The old Panther has been getting a bit greedy lately, in fact it’s been getting so that I needed to top up her oil just about every time I filled her petrol tank.
Now Panthers are known for their thirst for oil but this is a bit extreme, even for one of them and so it was obvious “something needed to be done!”.
One reason given for their thirst is their old fashioned oil ring technology, straight out of the early 1930’s!. Bearing this in mind, as well as the fact that the old girl had been rebuilt onto a worn bore and that I’d put another 4kmiles at least onto that, I decided to try a new bore.
There is a conversion available through the Panther club where you replace the piston with one from a Rover 3.8 car engine, This involves some modification work to be done on the piston but an already modified piston is available through the club, as are all the required gaskets for the job.
It means over-boring the barrel to plus 75thou but there is sufficient “meat” in the barrel to accept this and still be able to take the next oversize! These old girls were well built though, and to last!!.
When I originally rebuilt the old lady there was a choice of barrels to use. The one I selected had the better bore but a broken fin and I used this in preference to the cosmetically better but worse worn barrel so this is the one that has been bored out to suit a club piston.
I had asked for the barrel to be bead blasted before being bored but this was not done so I had to set to with wire brushes on the barrel once I got it back to clean it up for painting.
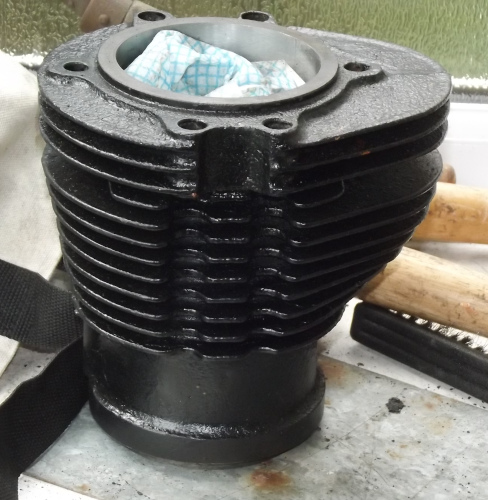
It was then given 3 coats of black “Smoothrite” from a rattle-can and put out in the glazed porch to harden off in the sun for a week.

The barrel resplendent in its new paint
All this could be done before a spanner needed to be set on the old lady herself and that moment had now almost come!.
A decision had to be made as to the cylinder head. This would need to be repainted to match the barrel. It’s a cast iron head so the obvious seemed to be to just black it the same as the barrel. BUT! An option appeared.
Back at the time she was originally built the “go to” option for the more sporting bikes was to have a bronze cylinder head, aluminium alloy technology not yet being up to that job and, knowing that there had been a number of bronze heads cast for Panthers, I could paint the head in bronze!. Decisions! — Decisions!!.
Anyway before I could do the head I had to remove it from the bike so it was out into the garage and start the dismantling work.
As always stripping off the ancillaries takes longer than the actual dismantling but the old lady soon stood with her head stripped off.
Looking into the barrel I could see the piston crown was oily so that explained the high oil usage!.
I tapped the head through-bolts down to level with the top of the barrel and then left her there while I got to work on the cylinder head itself.
A session in the wash tank got the head cleaned of oil and then it was a case of out with the wire brushes to get it down to as near bare metal as I could before painting began.
Also required before paint was applied was to mask off the exhaust stub threads and the joint faces, it’s surprising just how fiddly a job this is!
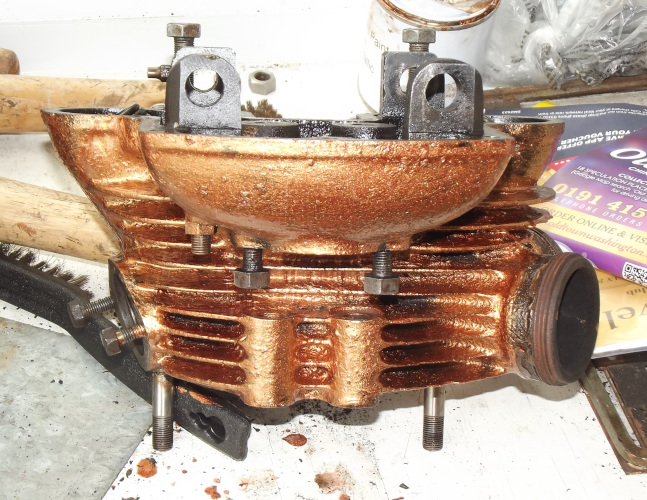
I went onto ebay and got a tin of a high temperature bronze paint, paint intended for brake callipers and I’ve given the head a couple of coats so now we’ll just have to see how well this paint stands up to the temperatures round the exhaust stubs!, if it come to the worst I’ll just give the head a coat of cylinder black and go back to standard.


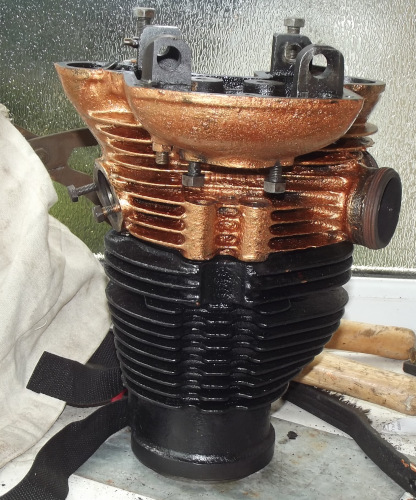
The cylinder head in bronze and it fitted in place
It looks a bit bright here but it should dull down with a bit of use, otherwise I can add a spot of black to the paint left in the tin to mute it down a bit and give the head a coat of that.
A snag when re-building a Panther engine is that the standard cylinder bore is 87mm. The biggest of the easily available “Terry’s” piston ring clamps however only goes up to 85mm. It can be stretched to cope with 87mm but it won’t cope with the 89mm Rover piston so the usual assembly trick of sliding the barrel onto the piston with the rings in a clamp won’t work, especially since the overboring takes out most of the usual taper lead-in from the barrel base.
This means I’m going to have to assemble the piston into the barrel and then offer the barrel and piston together up to the crankcases, slide the gudgeon pin into place and fit the circlip, what could easily be done on my own has just become a two person job, one to handle the barrel and the other to fit the gudgeon pin!
Anyway the original barrel is now off and I’ve got the crankcase face all cleaned down, I’ll use some Hylomar as a sealant here on re-assembly to try to keep the joint oil-tight.
