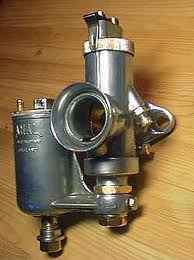
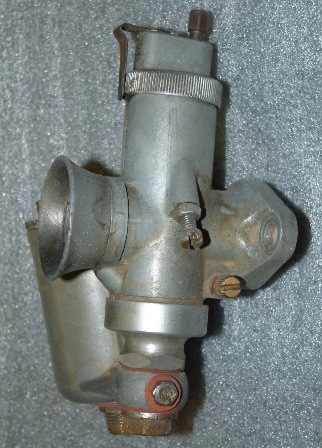
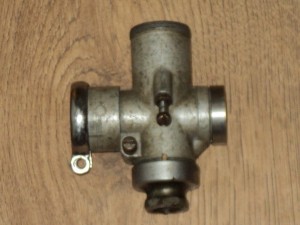
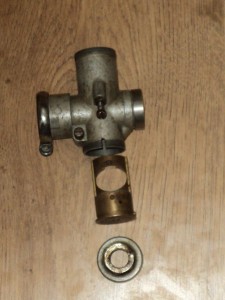
Next is to strip and clean the carburetter
No, that’s not a mis-spelling, the bike is fitted with an AMAL instrument and they have always used this spelling for their product so if it’s made by AMAL it’s a carburettEr and if it’s from an other manufacturer it’s a carburettOr.
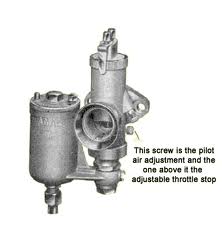
Pre 1955 AMAL supplied their 276 and 289 series, these had a separate mixing chamber and float chamber and it’s this type that’s fitted to my Panther.
Strictly speaking I should be using an instrument from the even older 76 and 89 series as the 276 and 289 types came into use in 1940 when there was a design change in the pilot air inlet system but my bike has been fitted with this later type at some time in it’s life.
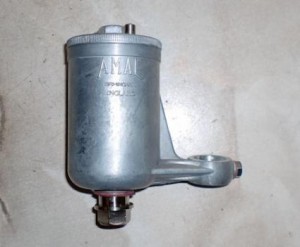
First step is to remove the float chamber.
This is attached to the main body by the nut at the base of that chamber, undo that and the fuel chamber comes away in your hand, exposing the main and needle jets, and can be put to one side for later.
The main body or “mixing chamber” is basically two tubes in a cross, the horizontal tube being the main airway and the vertical one contains a brass jet block held in place by a ring nut screwed onto its base and it also contains the throttle and choke control slides.
This chamber comes apart by first unscrewing the knurled ring nut at the top of the vertical, (on mine the thread in this nut is worn and it has to be replaced).
You can now withdraw the choke and air slides from inside the body.
There is also a large ring nut at the bottom of the body, with a hexagon to take a spanner/wrench and removing this gives access to remove the jet block (but remove the main and needle jets first).
This ring nut is the same thread form and diameter as the knurled ring nut at the top and so I used this to check that the threads at the top of the body were sound.
The jet block is a light press-in fit into the zinc/alloy main body and will readily push out. Notice that there is a special composition washer goes between the base of the jet block and the nut and that the correct gasket MUST be fitted (some cheap, pattern, gasket sets supply a paper gasket for this that is too thin).
All that’s left in the main body are the pilot air screw and the slide stop screw so these were removed and the whole assembly of parts put into an ultra-sonic cleaning bath.
After a session in this bath the passages in both the jet block and the main body were blasted through with an aerosol carburettor cleaner and then the whole lot were given another session in the ultra-sonic bath before they were allowed to dry off.
Come re-assembly and first step is to fit the jet block into the main body, as this is a light press fit and I didn’t want to use force here the body was heated up in boiling water and then the jet block fitted.
You need a bit of attention to detail here as it is possible to put the jet block in in two ways and only one of them is right since when it’s 180 degrees out of phase the passageways in the body and the jet block don’t line up with each other.
With the jet block fully home in the body you next fit a new composition washer and then the bottom cap nut, it’s a good idea to fit the needle and main jets now as well, you can fit the fuel chamber’s banjo bolt loosely here just to keep any muck out of the jets.
The throttle slide has the needle position checked that it’s in the correct notch and is then slid into place and its easy movement checked, you can also check for wear in the slide and body by trying to move it back and forwards in the body. If needs be it is possible to have the top of the body bore out to true again and the slide sleeved to fit the new body, if the whole length of the body is bored out then you’ll need to get the base of the jet block sleeved as well so make sure whoever does the work for you knows what he is doing.
Now is a good time to fit the slide stop screw since you can keep a finger on top of the slide while you fit it and so find the exact point at which the slide is being raised off the the mixing chamber’s floor.
Once it starts to lift give it one full turn more to give a “set up” position to the slide.
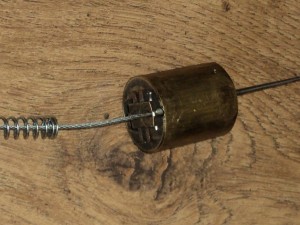
The choke slide is next dropped into place along with it’s guide tube and spring,
Then the throttle slide spring and the mixing chamber top is fitted and secured with the knurled ring nut.
Only thing left to refit is the pilot air screw and this is screwed in until it bottoms and then turned back one and a half turns to the “set up”position.
While doing all this the float chamber had been quietly bubbling away in the ultrasonic bath so it was given a scrub with an old tooth brush to get the last of the muck off it, same as was done with the carburetter body.
This is a bottom feed chamber so the float needle is dropped into place through the fuel inlet union and the float dropped onto it from the other end.
With an original float, it is held onto the needle by a spring clip fixed onto the top of the float so the clip has to be nipped between fingers and the float slid down the needle until it engages with the correct one of the two notches on it.
With a 276 carburetter you use the lower of the notches on the needle and you have to push the needle up at the same time as you slide the float down it until you feel the clip engage the notch.
The modern, plastic, replacement float uses a loose clip, the same part as secures the throttle needle in the throttle slide, to locate the float needle rather than having the clip as part of the float.
Now it’s just fit the float chamber top and tighten the locking screw on it and you then fit the float chamber onto the base of the mixing chamber, using a new fibre washer either side of the banjo, but don’t nip it up tight yet! and the assembled carburetter can be put on the shelf till it has to be fitted.
When you come to fit the carburetter to the bike first thing is to attach the throttle and choke cables to the two slides.
The cable inner wires fit through the adjuster screws on the chamber top.
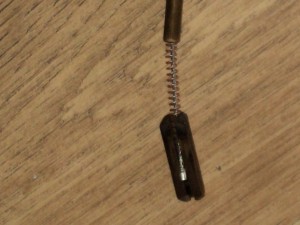
Tthe choke cable then goes through both the upper guide tube and the spring for the choke slide and then, while the spring goes down inside the slide the end of the cable is slid down through the slot in the slide and then the nipple is seated in the bottom of the slide.
The throttle cable goes through the throttle slide return spring, attaches to the socket in the outer edge of the throttle slide and is retained in place with a split cotter.
The two slides can then be slid into place in the mixing chamber, the top fitted in place and the ring nut screwed down.This is made easier if you set the choke slide to the open position and hold the throttle open so their springs are compressed.
The body is then bolted onto the inlet port adaptor with a heat-insulating washer between it and the inlet stub and the copper fuel feed pipe attached to the base of the float chamber.
NOW you can tighten the bolt attaching the float chamber to the mixing chamber.
Once this is done you can set up the free play in the throtle and choke cables using the adjuster screws on the mixing chamber top.
As the jetting has already been set up to the published figures all that’s left is to set the tick over and the pilot air adjustment, but this has to be done on a hot engine.
The basic settings, with the pilot screw one and a half turns out and throttle stop one turn open, will allow the engine to start and run, if it’s tickover is too fast you can turn back the throttle stop a bit but you now need to go for about a ten mile run to get everything warmed through.
Then, working quickly so the engine does not overheat, it’s just a case of reduce tick-over with the throttle stop until the engine begins to falter, you now adjust air screw till it speeds up, then slow it on the throttle screw again and repeat until it’s as slow as it will go, then screw in the air screw an eighth of a turn.
Check it now picks up cleanly when you add a bit of throttle and that’s the job done.

