
Another problem that arose was with the fuel tap.
Panther only provided mounting for a single tap in the tank, with a balance pipe between the two sides so that you did not wind up with the tap side of the tank dry and fuel trapped on the other.
This does mean however that, unless you have a fuel tap with a built in reserve function, when you run out of fuel you will wind up pushing the bike. A Panther is a heavy machine to push, not only that but the nearest fuel is always in the opposite direction to the one you are pushing!.
To further complicate things, rather than use the common tank outlet size of 1/4 inch BSP they opted to use the rarer 1/8 inch BSP size, (you should realise here that with the pipe thread sizes, (British Standard Pipe) the dimension refers to the bore of the pipe and not the OD of the thread) it so happens that with this design of tap there is no difference in the internal bore of the actual tap with either size.
The tap I had was the common ENOTS hexagonal body type and it did have a reserve, but this was seized so I went looking for a replacement.
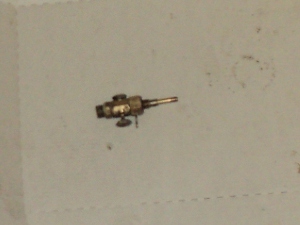
The seized fuel tap
I found a number of sources which listed this tap in both 1/8 and 1/4 inch sizes but when I tried to order one I was informed by them all that the 1/8inch size was “out of stock” and they had no idea when they would get any in, but they could supply the 1/8 inch size tap without a reserve.
So, nothing ventured nothing gained, I decided to try to strip the seized tap and clear it.
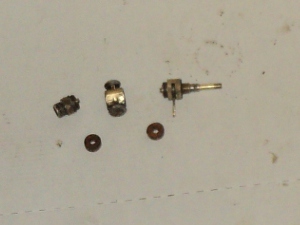
Dis-assembled fuel tap.
The cork sealing disks are below the main tap body
As you can see the tap splits into three major parts, the top section, which contains the reserve mechanism, the centre which has the “On – Off” slide and the lower section which connects to the fuel line. The taps seals are the two disks of cork, each with a central hole, which are compressed one against either side of the centre’s slide by the other two sections.
There was no immediately obvious way for the reserve to come apart but as there was obviously an inner sleeve and an outer I decided to try a little pressure against the projecting end of the inner.
A suitably sized socket was placed at the lower end and the tap and socket nipped together in a vice.
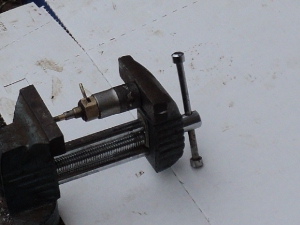
Tap being pressed apart
Given steady pressure the inner sleeve began to slip down into the outer, so it was pressed down until it was flush and then removed from the vice.
For all it had come most of the way through, the inner section still would not simply pull out using my fingers and since I did not want to damage the sleeve surface with grips I used a pin punch to knock it the rest of the way through.
Once it was apart the reason why it would not move was obvious in that the brass insert was blackened with corrosion but at least it was not pitted.
I polished it clean with a fine grade of wet and dry paper and then re-assembled the two sleeves and found that the reserve function was now working without problem so they were again disassembled.
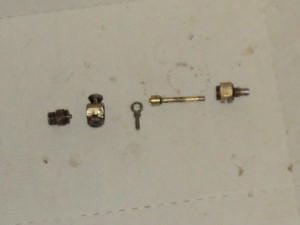
Tap with reserve stripped
As I had a pair of new corks for the tap, before fitting them they were soaked in boiling water for a half hour to soften them.
The reserve sleeve was then wiped with silicone grease and whole tap then re-assembled with the new corks in the main body and I had a functional reserve tap for use on the old lady.