
This entry is not about the Panther but its more modern stablemate, my BMW R850R.
With my playing around on the Panther lately this has been left standing for the last couple of months and when I had it out last Friday I found that one of the front brake callipers (this bike is fitted with twin four-piston Brembo disk-brakes) was sticking on to the extent that the disk was too hot to touch, at least it made it easy to see which calliper was giving problems!.
As the bike now has over 110,000 miles under her wheels the decision was made to rebuild both callipers rather than just strip and clean them, the rebuild kits are not cheap at £58 each but since you get 4 new pistons in them as well as all the requisite seals they in fact work out cheaper overall than the kit for the Yamaha trainer I last did, that was a single piston calliper and stung me £17 for the seals alone!
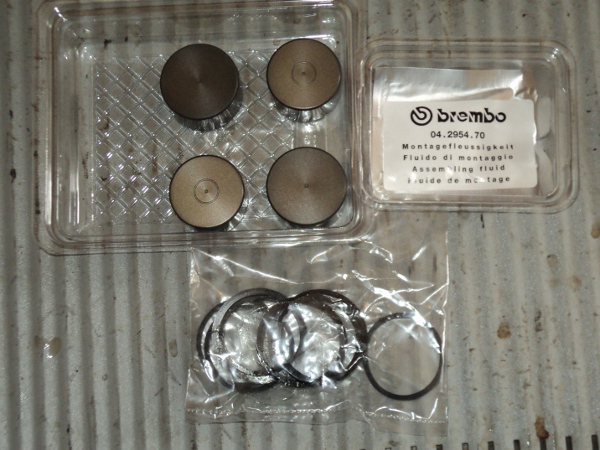
The “Repair Kit”
I have an old master cylinder I keep purely for the purpose of pressuring a calliper up “on the bench” and forcing the pistons out of their housing so first step was to take the calliper off the bike and clean it of road crud, attention was particularly given to cleaning the projecting parts of the pistons as these will have to be pushed back through their seals.
Once this had been done the outer parts of the pistons were lubricated with some brake fluid and they were pressed back into the housing, sounds easy but a fair bit of force had to be used, after all the calliper had been sticking!.
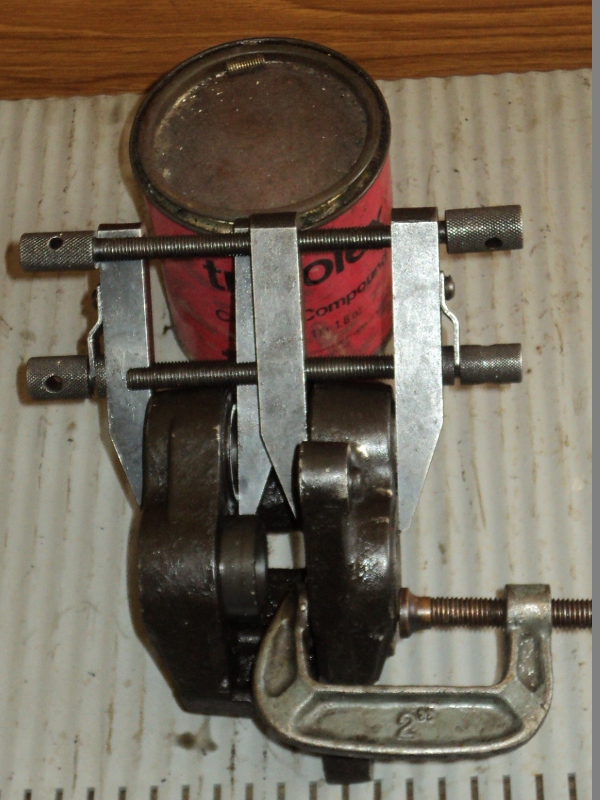
Calliper with clamps fitted and one piston partway out
A pair of toolmakers cramps and a “G”-cramp were then used to restrain three of the pistons, leaving one to be pushed out and worked on. The jaw length of the toolmakers cramps hold both sides of the piston down rather than just one and so prevent the piston from twisting in its bore, they are in fact long enought to overlap onto one side of the second piston as well so by also using a single “G” cramp both sides of a third piston can be restrained leaving the last piston clear to be worked on.
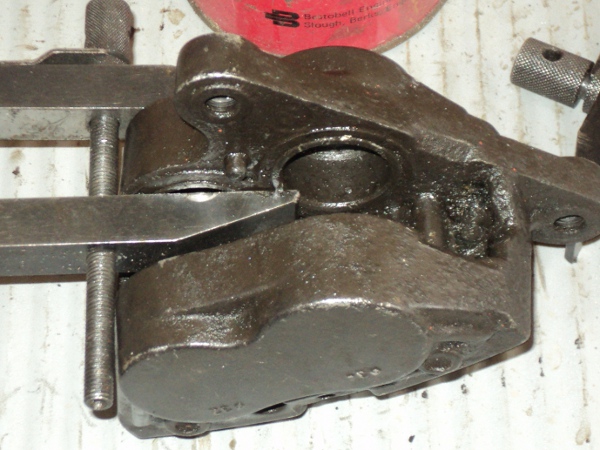
Toolmakers cramp covers one and a half pistons
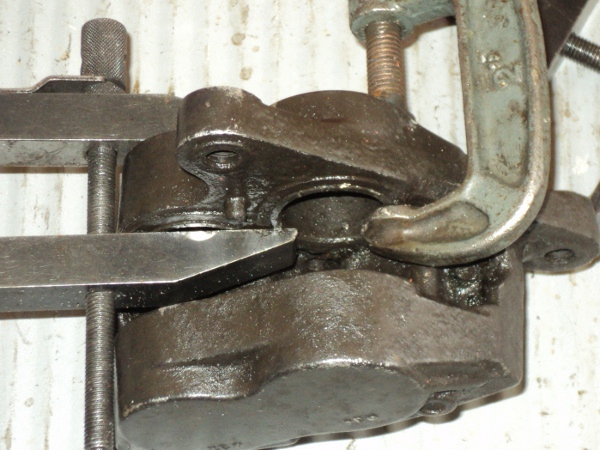
“G” cramp used to restrain other side of piston
A second toolmakers cramp restrains the third piston, leaving the other one to work on
The calliper was connected up to the “spare” master cylinder, the system bled and then used to press the piston out, as there would be brake fluid around “loose” when the piston came clear the calliper was wrapped in rag and put in a plastic tub to contain it.
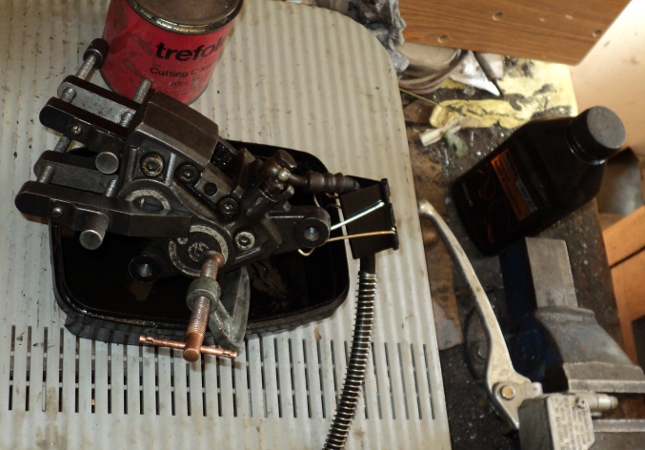
Pumping out one of the pistons
With the piston out of the way the bore could then be thoroughly cleaned out and then the seals could be taken out of their seats, a dental pick is a useful tool for this and those seats cleaned out so the new seals would seat properly.
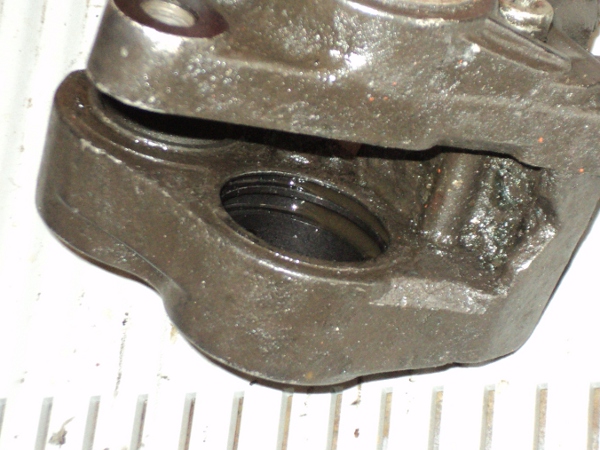
With the piston and seals removed the seal grooves can be cleaned out
The problem proved to be due to the weather seals having hardened with time and an accumulation of “deposits” on the exposed parts of the piston taking up the necessary working clearance between the piston and its bore.

The piston showing the “crud” causing the problem
The seats for the two seals were thoroughly cleaned out, the dental pick proving very useful for this, the only cleaning agent used was clean brake fluid and then a set of new seals from the repair kit was fitted.
These callipers use two slightly differing diameters of piston so it’s necessary to be careful as to which seals you use for which bore. (Yes I did try to fit the smaller ones into the larger bore!)
The kit comes with a pack of a silicone assembly compound so this was used to coat the seals before fitting them in place.
The correct sized new piston for the bore was then also rubbed over with the compound, the bore was lubricated with clean, fresh, brake fluid and the piston pushed into the bore.
It can be a bit fiddly to get the piston home in its bore as if it is not pushed in dead straight it will bind in the bore but with a bit of wangling it will suddenly just slide home and then you can move on to do the next piston.
Once all four pistons and seals have been replaced then it’s just a case of fitting the new brake-pads, putting the rebuilt calliper back on the bike and turning attention to the other calliper.
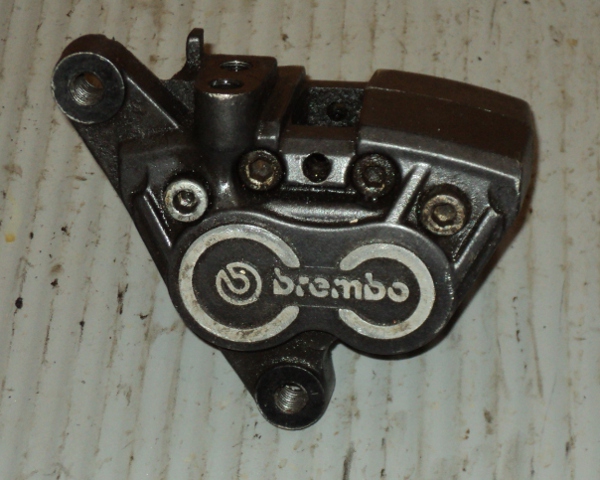
Rebuilt calliper ready to refit