
When I first made this sidecar I had a seat made for it, this seat is not really satisfactory but when I tried to have one made up properly I was told it could not be done at reasonable price, reason given was “No-one does it like that now-a-days”, which is why I’ve now made up a new one myself.
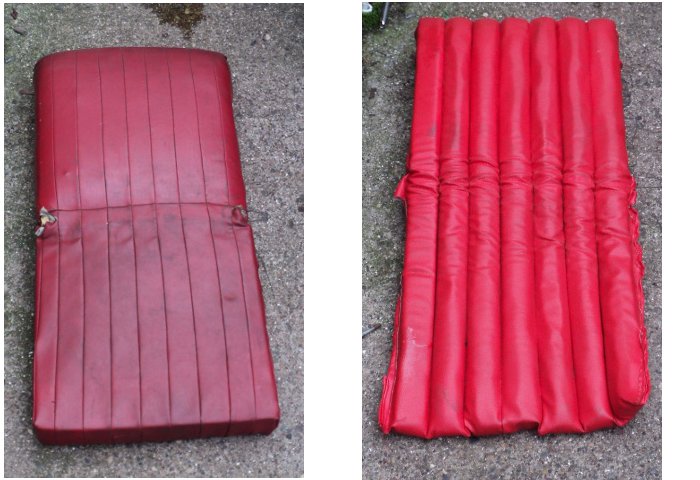
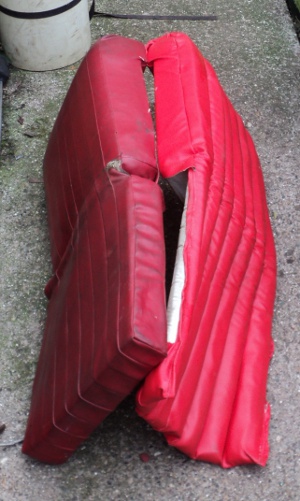
- The two seats, commercial one on the left.
As you can see the “professional seat” has been made by simply taking two blocks of foam and putting a cover on them and has a much thicker apron than the one I made, which is copied from an original Steib seat, the “bought in” looks like something you’d find on a bus!. This extra thickness reduced the knee clearance inside the cockpit and also made it a bit more difficult to get into and out of the sidecar. As the apron lies on top of a set of tension springs set into the cockpit floor it does not need to be as thick as this hence the thinner apron on the genuine Steib seats.
- Seat “aprons” compared.
First thing in making up the new seat was sorting out materials.
What’s needed is a new back-board, foam padding and covering materials.
The seat has a wooden back that hooks over a tongue on the top of the rear bulkhead of the cockpit and at the bottom is shaped to fit into the octagonal body.
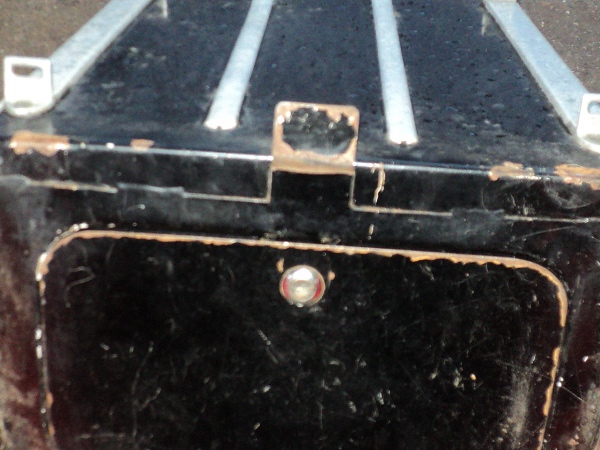
- This is the tongue the seat locates over
Onto this board is fixed a block of upholstery foam which is covered and held in place with heavy calico and over this goes the reeded top-cover with lower “apron” that goes on top of the support springs.
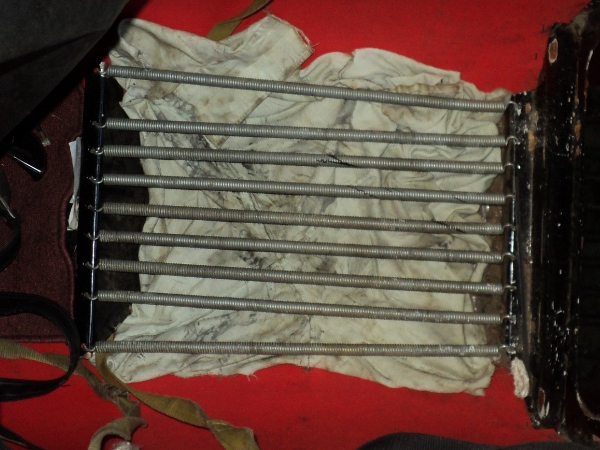
- The springs that support the “apron”
On looking round the ‘net I found “Woolies” from whom I could source the foam and covering materials and I went down to the local DIY shop for some 12mm plywood from which to make the backboard.
I ordered up some 50mm and some 38mm foam along with the red vinyl covering material and calico.
To stitch the covering together I used an old-fashioned “Singer” hand-cranked sewing machine fitted with a needle intended for sewing leather.
A modern electric machine baulks at sewing the multiple thicknesses of the materials I’m using.
The foam was supplied as a rectangular block and had to be cut to shape, this was easily done using an electric carving knife, bought as a special offer and afterwards donated to the kitchen.
First thing was to make up the backboard
The flat main board has a top “overlap” that is made up from another three pieces of plywood fixed to this board to allow it to locate over the tongue on the seat bulkhead.
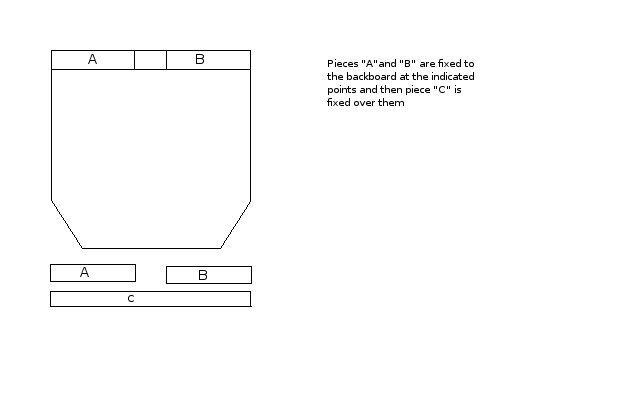
Backboard
The two pieces “A” and “B” were glued and screwed to the top of the backboard as in the sketch and then the long piece “C” glued and screwed on top of those.
The piece of 50mm foam was cut to fit onto the side of the backboard away from the overlap and then glued onto the board with PVA glue.
The foam was then covered with a piece of the calico which was taken round onto the back of the board and fixed there, PVA glue again and a staple gun used to secure it.
To be continued:-