
Once the paint on the tank had been given time to cure it was a case of masking the edges of the panel with a narrow tape that would follow the curve that I wanted.
After I had the panels outlined with the narrow tape I then masked off the rest of the panel so that when the dark green was sprayed onto the main body of the tank it would not get onto the light coloured area of the panel.
The rest of the tank was then rubbed down with 400 grit wet & dry paper so that there was a good keyed surface for the top coat and two coats of the dark green sprayed on.
The second coat was given 15 minutes to start to cure and then the masking was stripped off the tank.
Reason for this is that as the paint is still soft, stripping the masking tape off will not leave a chipped edge on the new paint, also the edges should still be able to flow a little and will then leave a softer edge between the main tank colour and the panel.
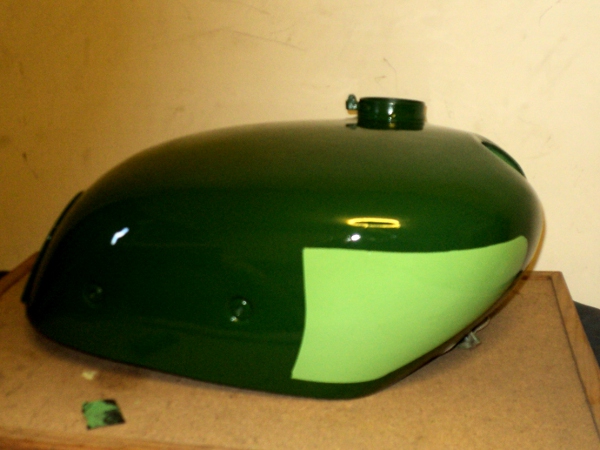
Painted Tank
The tank was then left for a couple of days to cure and it was then gone over with polishing compound to rub down any minor irregularities and to give a gloss finish, then a layer of laquer was applied.
Now the tank had to have the coachlines added.
Traditionally this is done freehand using a special lining brush and it needs a steady hand and a deal of practice to be able to do this.
Fortunately there is away round it. You can get a special lining tape where there is a backing tape carrying two strips of masking tape the required distance apart.
You put this in place where you want the coachline, strip of the backing tape to leave the masking tapes and then carefully paint in between those tapes, strip the tapes off and there’s your coachline.
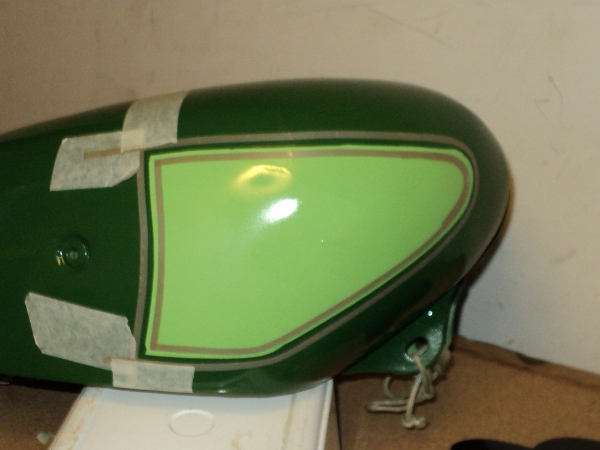
Tank prepared for coachlining
Sounds easier than it in fact is as it is fiddly getting the backing tape positioned round a curve, it will take a bend but the tighter the bend the more awkward it is to get the tapes to lay flat and keep a constant line width but with a bit of time and patience you can get a good result. The extra pieces of tape at the rear corners are to give a “run off” so that I could take the paint to the end of the lines without worrying about over-running.
The tape is an American product, called “Finesse Lining Tape” and there is a choice of tapes to give various widths of line, it is also supplied to give double lines if you need them. Their UK agent is A.S.Handover and you can Click here for a direct link to their catalogue pages of these tapes, not only that but they can supply you with signwriters paint to make the lines with and even the pukka coachlining brushes if you wish to try the traditional way.
Once the tank had been lined I applied the transfers (or decals if you prefer the expression) and it was left it to dry for a while.
The whole thing was then given a couple of coats of laquer to seal everything and that was that.

Finished Tank
I got the transfers from the Vintage Club’s transfer scheme who have transfers for over 350 makes. Click here to go to their site.
Well that is an interesting half hour spent going through this years blog Drew. I obviously don’t know your work background , but your resoursefulness and patience is to be commended. We will all look forward to seeing and hearing your “old lady” running before too long at the N.E. Section of The P.O.C. Well done and keep up the good work. Steady as you go.
Drew
What happened to that lining tool you had?
It was put “somewhere safe”, anyway I did not have a wheel big enough to line the tank with.