Category Archives: Sidecar

Sidecar

Blown Seal

After the run out to the Corbridge Show on the R12 the next outing was to the VMCC’s Scarborough Touring Week.

As this meant a week away under canvas I opted to take the old girl down there on a trailer behind the car. Reason for this was simply that I would have been unable to carry all the gear for a weeks camping for myself and the two dogs on the outfit.

On this event there is a road run each day and there is the social side each evening so it makes for an enjoyable week away.

Day One was the Friday with the run down the A19 towards York and then across to Scarborough. I chose this longer route because there are severe hill climbs with tight bends on both of the shorter routes, one being up Sutton Bank and that’s bad enough without a drag behind you!.

Anyway I got to the campsite in good time, offloaded the outfit and set up camp in time for the first evenings socialising.

The Saturday was a short run out, only some 60 miles around the area and everything seemed ok but when out on the Sunday problems arose.

The R12 has a separate Magneto/dynamo unit sitting on top of the engine. This necessitates a seal between the two and this blew. There is a carrier plate with a felt seal against the magneto end plate with a cork ring gasket sealing the plate to the engine housing and this is what blew, covering the left side of the motor in oil.

The oil got onto the plug lead and gave the spark on that side a pathway to track to ground and short out the plug.

Just to be awkward it would only track when the motor was under load, as when on a steepish climb, but when light loaded she ran OK! Typical!!.

I limped back to the main road on about one and a half cylinders and once on the main road it was a level run back to the camp-site so, of course she ran sweet as you like under the light load.

Monday was a run out to the aircraft museum at Elvington, near York, and rather than risk things I went over there with the two dogs in the car and had a good look round but I’d have preferred to be on the bike.

Tuesday was the “Extreme Hill Run”. I’ve done this run before using my R80/2 convert rig and it had tried the brakes on that lady so I had opted not to go on that run when I booked for the event.

This gave me a day “on site” when I could have a go at fixing the bike.

I tried various options at the “roadside get you home bodge” level but without success, it seemed the inner felt seal had gone and I was going to have to take the magneto unit off the bike to fix things.

This would have meant losing the magneto timing and this was not a job I wanted to undertake on a camp site, it’s not all that difficult but it is rather involved with an R12 outfit, meaning taking the sidecar off for access and then removing the gearbox to access the timing marks.

Wednesday I opted to stay on site again as the weather was rather inclement, i.e. it was p—ing down and while I could have gone in the car, I don’t see the pleasure in driving in rain any more than in riding in it!

Thursday dawned a nice day, but owing to other commitments at home I needed to back by Friday so it was a case of see the Thursday run out off, then pack up and drive home.

So, to fix the R12 I’ll need to get new seals and some other bits for her. These will have to be ordered up, probably from Germany, so it looks as if she’ll be off the road for the rest of the month, I’ve the R80/2 combo off the road with a repair to the sidecar so I’ve only a solo on the road at the moment.

Means I’m restricted in what I can do because of the two dogs, Looks like I’m just having to go to local events till I get an outfit back on the road.

First Run Out

Went out for a decent run on the R12 combo on Sunday, around 70 miles all told.

The sidecar chassis I’m using on her is the same one I took off her some 5 years ago when I started working on the Panther and needed the space in the garage.

When I put it back on I just bolted everything up “as was”, assuming the fittings had not been moved so, although Steib fittings are reputed to be good for this trick, I was a bit apprehensive first time out.

I’d taken her out first for a couple of miles to make sure there was nothing drastically wrong but this was to be the first real test of things.

So it was a case of load up, dogs in the sidecar, fire the bike up and away we go!.

All outfits tend to flutter their bars as you pull away, once you are used to driving an outfit you only notice this if it is excessive.

Use of a steering damper limits this but where your damper is the old-fashioned friction type it can stiffen up the steering generally.

I had my damper set at 3 clicks from off (one click gives JUST enough rub to keep the damper plates clear of rust when running as a solo) and did not notice any flutter worth commenting on so that was a good sign to start with.

Next was how stable the steering was. The R12 has a hand operated gear-change so you need to remove your right hand from the bars to change gear. If there’s any instability in the steering this is where it will show up and it didn’t, no wobble detected.

Now an outfit is a peculiar vehicle, it is a twin-track machine but is driven and braked on one track only. This means that, when the outfit is properly set up, on acceleration the bike tends to pull towards the sidecar and on braking the sidecar tends to pull towards the bike so that when on the open road much of your steering is done with your throttle. Much of the “Black Art” of sidecar riding is in getting to know how to use this.

If the set-up is incorrect then the outfit will tend to always pull to one side or the other. So, how was the R12?.

Answer is “Just about right!”. She steered nicely on the throttle and also ran straight when on a steady gas, it only needing one finger on the bars to hold her straight, always a good rule of thumb!.

After some 20 miles I took stock a bit, the R12 is lower built than the Panther, this results in the bars being lower than I’m used to with the Pussy and a feeling that I’d prefer them to come about a inch and a half further back and the same higher. I don’t remember this feeling when I was riding her before so it’s just going to be use.

The R12 has footboards whereas the Pussy has footrests, in theory there is greater choice of position on the R12, but it’s a boxer twin, you’ve a cylinder complete with carburetter in front of your foot so in fact there’s very little difference.

Another difference is that the R12 has telescopic forks in comparison to the Webb girder fork on the Puss.

Telescopic forks are at a disadvantage for sidecar work compared with either a good girder fork or a link fork, they have an inherent flexibility which does not affect handling as a solo machine but does affect a sidecar outfit, however those on the R12 have only a limited range of movement available, and given the limited performamce of the old lady this is acceptable in this case.

How did she perform?. Well remember the old girl is 80 years old and what was considered good back then is slow now. I have a Sigma electronic speedo fitted to her which has been set up on a measured half-mile nearby. On a major road along the level I was comfortably holding an indicated 41 to 44 mph. On hills this was dropping back to around 38 to 39 mph.

I was seldom over about half-throttle so there was power in hand, and one thing you rapidly learn with an outfit is to always have that “bit in reserve”.

Performance is comparable to that of the Pussy on chair, a difference being however that while the R12 is pulling sidecar gearing the Pussy was left to pull her normal solo gearing.

This means that under ideal conditions the Pussy will be faster on sidecar, she will tend to “bog down” more, requiring more frequent use of the gearbox and dependance on the intermediate ratios.

Conclusions are that I’ll soon get used to the R12 outfit again, that what is said about Steib fittings not loosing their alignment when the sidecar is taken off the bike is true, and that as I discovered when manhandling the two different chassis around off the bikes that the Steib chassis is considerably lighter then the Watsonian!.

Reason for this will be that the Steib is welded construction while the Watsonian is a hearth brazed fabrication with heavy forged lugs and straight tubes giving the Steib the same advantage the Featherbed Norton frame had over its rivals.

Meet The R12

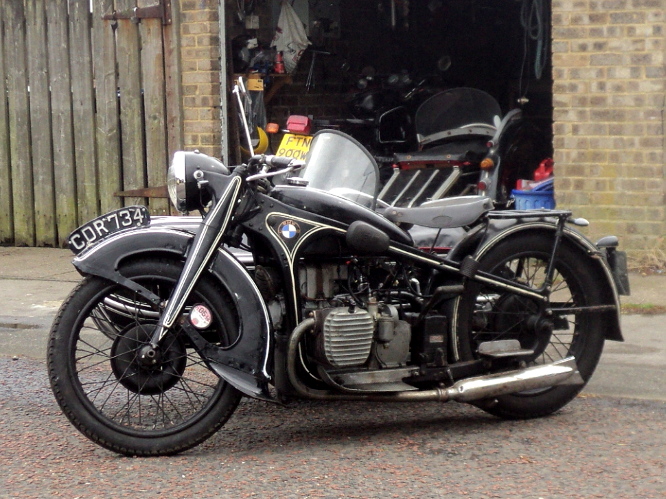
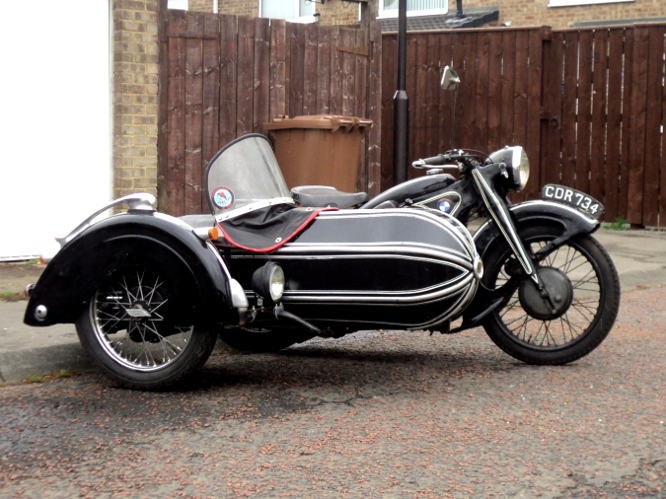
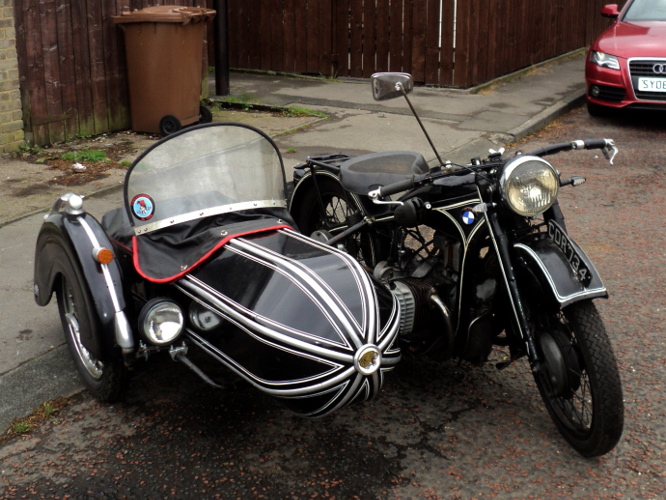
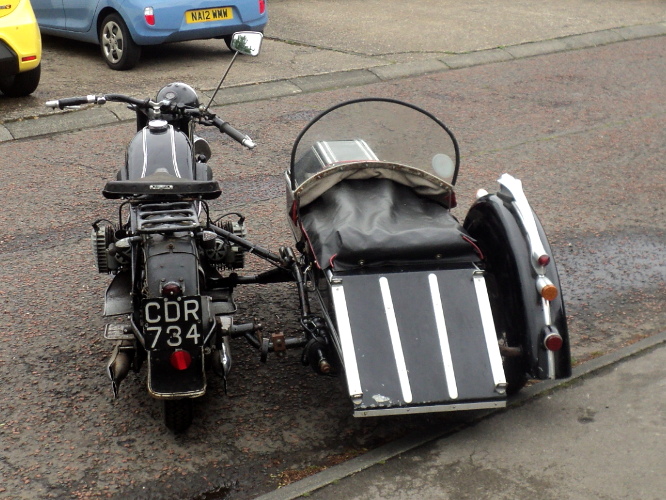
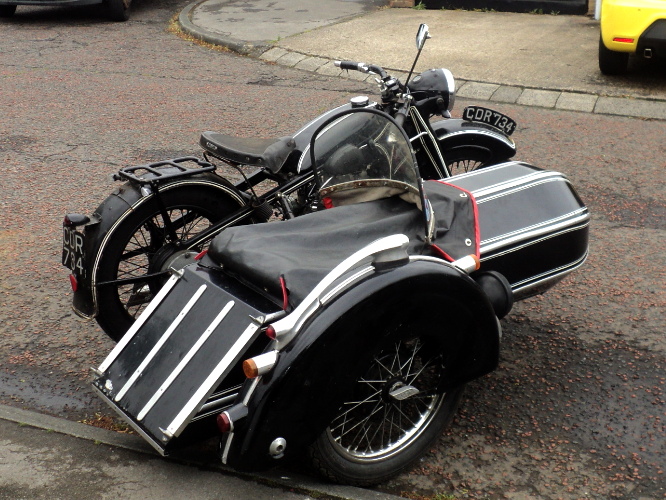
Looking back on the last few posts I can see that I’ve been talking about the BMW R12 but there have been no pictures to show what that is, so this is her ladyship :-

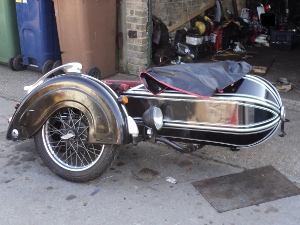
This is showing the sidecar side view :-

Front Quarter view is :-

And the view most likely to be seen by other traffic (as they come up to overtake 🙂 )

And as they pass:-

A Further Update

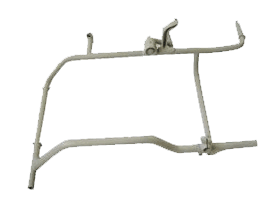
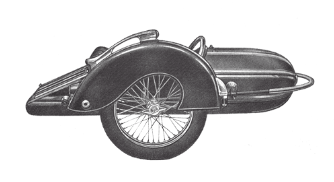
I’ve had the R12 out a couple of times now and so it’s time to think of the sidecar. As I’ve said before this is a composite of a Steib S350 body on a Steib LS200 chassis

Steib LS 200 Chassis

Steib S350 Sidecar

First thing is lights!.

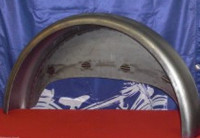
I can’t just swap the mudguard from the Panther’s chassis over, although this would be the simplest way, because the guard mounting systems are totally different, and anyway the LS 200 chassis is a Steib and so has the “art deco” flared guard rather than the old style half-circle guard.

Old Style Mudguard
Steib Sidecar Mudguard

The guard I have for it is a fibre-glass reproduction so the lamps on it need to be independently eatrthed, and then I’ve to fit indicators as well.

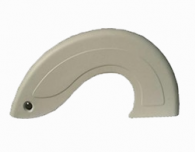
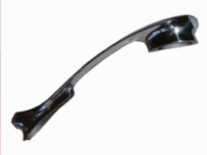
On a Steib the sidecar lights are built into the grab handle on the mudguard.

Steib Grab Handle

There is a tunnel cast into this handle that normally only carries a single wire forward to connect between the front and rear lights, power being fed into the handle by a hole through the guard at the rear mount.

This tunnel now carries the power leads for both the front light and the indicator as well as an earth lead, the leads to the indicator carrying on through the guard at the front mount of the grab handle.

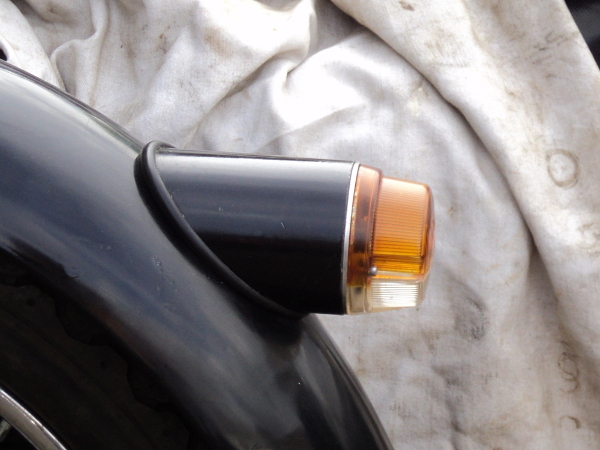
For the indicators I’ve used a smaller version of the mounts I made for the Panther chassis, 2 inch diameter tube rather than 2½ inch and fitted with amber LED units sourced from the Internet.

New Indicator Units

I’ve changed to using LED bulbs in the grab handle as well and I’m using a stop/tail in the rear light.

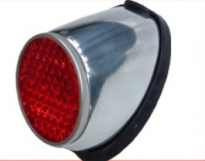
Also, since the standard Steib rear light is rather small I’ve fitted an LED light into the rear reflector unit, so converting it into another rear light.

Steib Rear Reflector

This all means that now there is now a 4 wire loom leaving the mudguard to connect to the bike rather than the original single wire.

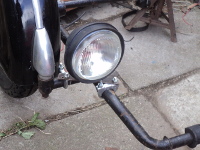
I’m also fitting a spotlight onto the chassis in front of the mudguard. This is also fitted with an LED bulb and is meant to act as both a DRL and as a running light.

Spotlight cum DRL

I’ve had to be a bit crafty here.

My R12 was built back in 1940 and her generator is of rather limited output, nominally of 6 Volts and all of 36 Watts!.

As standard on 6 volt electrics it would balance the lighting load of a solo machine and still have a little in hand to keep up the battery, but with a sidecar fitted there’s no leeway at all.

While I have converted the dynamo to give 12 volts output using a modern electronic regulator, which does help a lot, full lights on all the time are not really feasible, although the use of LED lights does help a bit.

So what I’ve done is to wire the spotlamp and the pilot bulb to work separately from the main lights, worked with a separate switch on the ‘bars, and I’ve fitted a 10 watt Halogen bulb in the pilot position as well.

The crafty is that there is also a feed from the sidecar running lights to the spotlight so that it will come on with the normal lights as well, I’m running with a right-hand sidecar in UK where the Rule of the Road is to drive on the left so I want a large front light on the sidecar side.

Problem is that doing this has power back-feeding both ways so with the lights switched off but the DRLs on the other lights come on as well so to counter this both feeds to the spotlight now go through diodes, as does the feed to the pilot light.

This means that I can now have two bright white lights showing to the front in daylight hours with only a small load on the generator but this extra load is not there when the main lights are on – so now, with the spotlight, there are 5 wires to connect between the bike and sidecar.

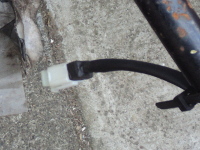
Traditionally this would be done using a nest of bullet connectors but I’ve opted for the neater way of using a 6-way “mini-connector”, as is used in a modern bike’s cable loom, with a feed for the other indicator in the 6th position.

This is because the R12 will comfortably be able to tow my lightweight box trailer and of course that means I need to feed all the trailers lights and indicators.

6-Way Connector

The trailer will make life easier when going on a camping event, my two dogs travelling in the sidecar and the gear in the trailer.

= = = = = = = = = = = = = = = == = = = = = = = = =

For any of you who want to tell me that LED lights are not legal to use on the roads I’ll point out that this bike was built in 1940 and so comes under the old regs.

These only ask for “A white light to the front and a red light to the rear” and do not ask for a kitemark or “E” numbers on the lights. After all people were still using acetylene gas lights on vehicles back then :^)}.

Update on the R12

Following from the last post the top coating repair on the front mudguard has been completed.

When I had a look at things the next day I was very happy as to the finish, the “Craftsman” paint I was trying out as a replacement for my old favourite “Tekaloid” came through with flying colours.

Only trouble was the contrast with the old paint, this had weathered over time so the new paint stood out like the proverbial on a barn door!.

So I broke out the “T-Cut” and gave the guard a good rub down and that did the trick, you no longer noticed the repair unless you looked closely, snag is I now have to do the rest of the bike to get it to match the front mudguard!.

The pressed-steel framed BMW’s, such as the R12, are quite heavily pinstriped so this repair has left a gap in the lining on the front guard that I’ll need to patch, so I now need to break out the lining brushes.

Lining is properly done free-hand and the difficult bit is getting a tight curve without smearing. My way round this is to mask out the line so that any smear goes onto the masking tape, problem is that with the BMW double line I’ll need to do one line and let it harden off before I can mask off to do the other.

I’ve also had the old girl out on the road for a run to see how things were.

I found that while she was willing to start and run, the start-up from cold was not as willing as it used to be and she was very reluctant to start from hot.

What I’ve done today is to treat her to a pair of new plugs, the old ones had been in for a long time now. I’ve also had the carburetters off and stripped and cleaned them, they have been standing for a couple of years and what fuel had been left in them had dried out and left a “varnish” of crud inside the passages and jets.

Fortunately she’s running on a pair Amal 276’s and these are an easy carb to strip down and clean.

I’ll need to synchronise the slides opening before I take her out again and while that’s a fiddly job it’s not that difficult.

I’ve also offered up the sidecar chassis to the bike. Before I actually fit it I’m wanting to rig a sidecar brake. I had a sidecar brake on the Panther outfit and found it useful, after all the bikes brakes are from the 1930’s and brake technology has come a fair way since then so every little helps.

The rear brake on the R12 is operated with a heel operated pedal on the right-hand side. What I’m doing is to mount another pedal onto the sidecar chassis with a lever coming straight across to the bike and level with the bike’s rear brake pedal, so that its pad lies alongside the bike’s one. This means that when I apply the bike’s brake I’ll also apply the sidecar brake as well, and by rocking my foot I can vary their relative pressures.

However I’ll also be able to apply either brake on its own to give differential braking which can be useful to assist in cornering.

Only thing now is that while I’ve the brake pedal set up I’ve still to arrange the cable fitment at the drum end of the system, as a “By The Way” the chassis I’m using is from an LS200 Steib. The wheel is from a Ural/Dneiper, a half width hub that looks in keeping with the R12 and the brake itself is an Enfield type from a rigid-framed Panther.

A Little Light

With the sidecar fitted and aligned, before I can take it out on the road it needs lights to be legal.

With it being a 1937 machine I just need to show “a white light to the front and a red light to the rear”, after all at that time gas lighting was still common, but as this outfit is to be used on modern roads I need to be a  bit more practical.

What I am fitting is a spotlight set up as a Daylight Riding Light, a white front running light, a red rear running light, a stop light and indicators.

Indicators are totally out of period but in modern traffic on a sidecar outfit they are “A DAMN Good Idea!”.

I had a pair of the Hella round indicator/running lights in stock so these became the basis of my lights.

As the wheel and mudguard (fender) are on the outside edge of the outfit the lights need to mount onto this but as the guard is semi-circular this gives a problem, the Hella units are intended to fit onto a flat, vertical surface and the guard has a compound curve, at the point where the lights need to mount there is a 45° slope to the vertical.

First thing was to make the mounts for the lights. These need to fit onto the guard and give a suitable surface to mount the lights.

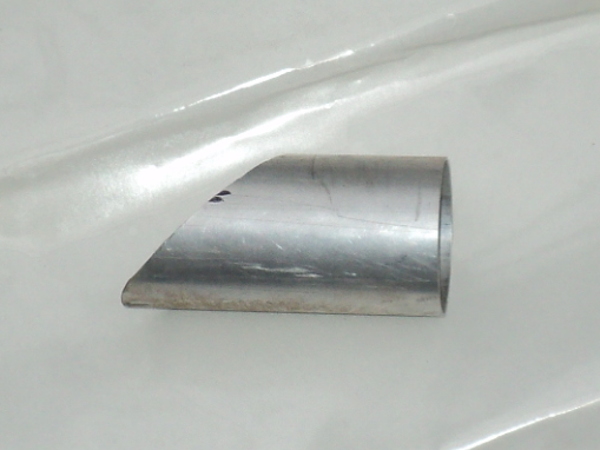
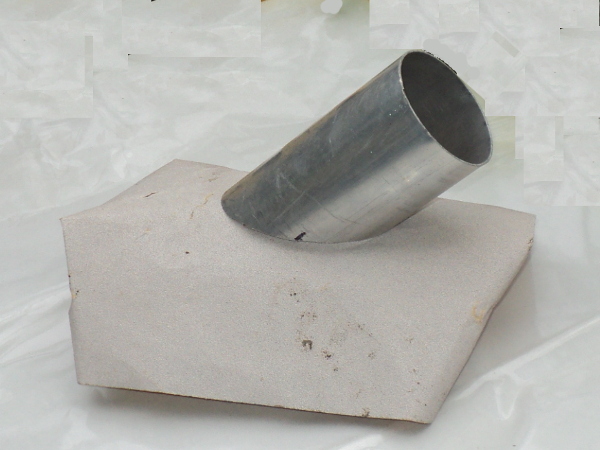
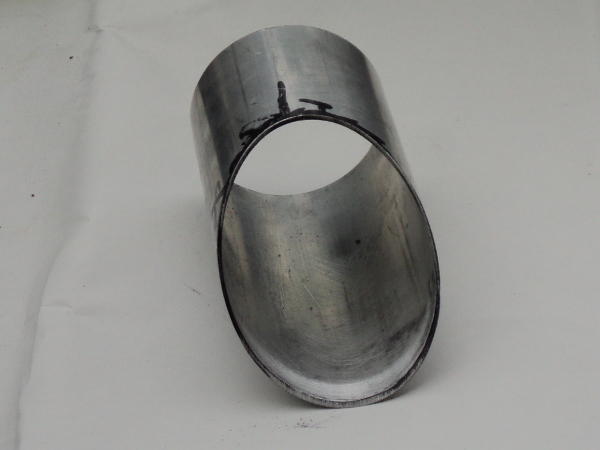
As the lights are 75mm in diameter I took a 6 inch length of 75mm OD alloy tube with a 1.5mm wall thickness and cut it into two lengths on a 45°angle.

Mount tube

The sawcut alloy tube

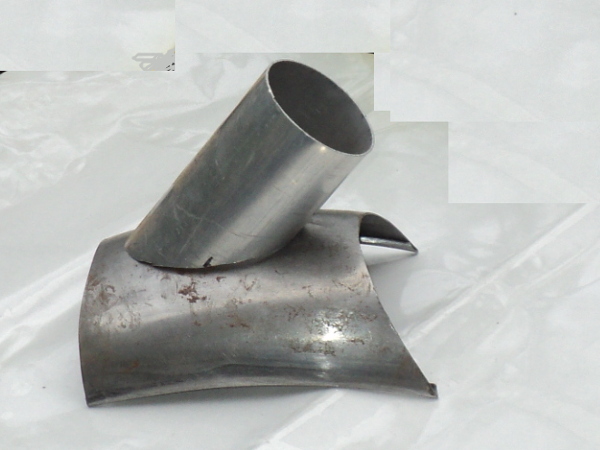
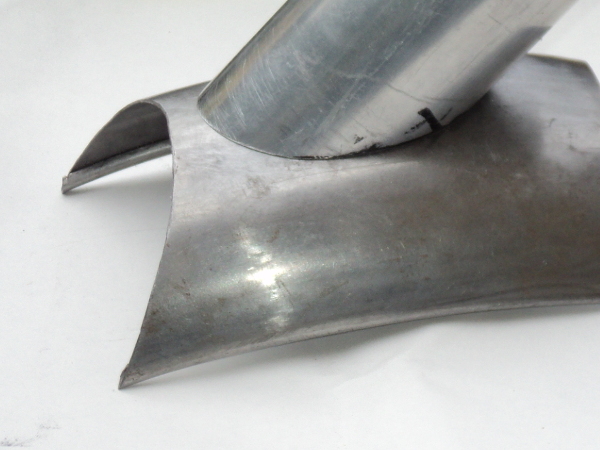
These, when mounted onto the guard will fit onto the guard part way up it and give the necessary vertical surface, unfortunately though the plain cut end does not match the curves of the guard.

tube onguard

Showing mismatch between tube and mudguard, it only touches at the ends

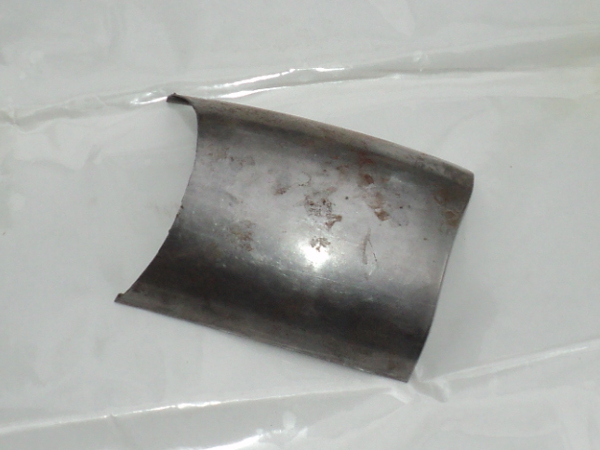
However from fitting the guard onto the sidecar I had a short length of it spare

spare guard

“Spare” length of mudguard

so I took this, fixed some 80 grit abrasive sheet to it.

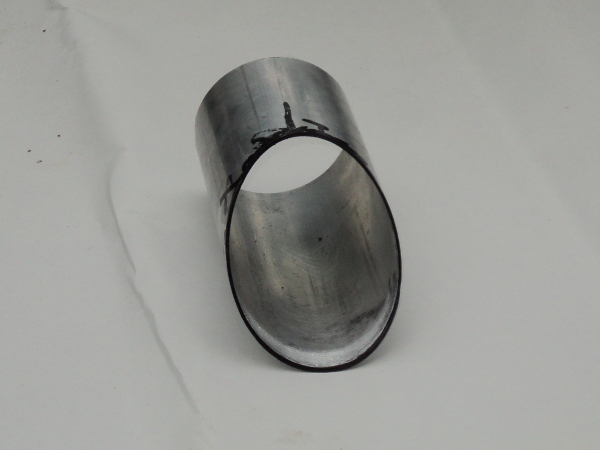
I next took a black marker, used it to “black up” the cut end of the  tube

tube end blacked

“Blacked-up” end of tube

and then started rubbing the mount on the abrasive sheet.

rubbing in

Rubbing in end of tube to match mudguard

This gave me “witness marks” showing where the guard was contacting the mount and so, where the mount needed trimming back.

witness marks

Rubbed end of tube showing “witness marks” where material still has to be removed

This was done using a Dremel tool and a sanding drum.

Repeated re-blacking, trials and trimming gave me a pair of mounts that were a reasonable fit onto the guard and which, given some rubber beading, would make a sound joint against it.

finished job

Tube matched to contour of mudguard

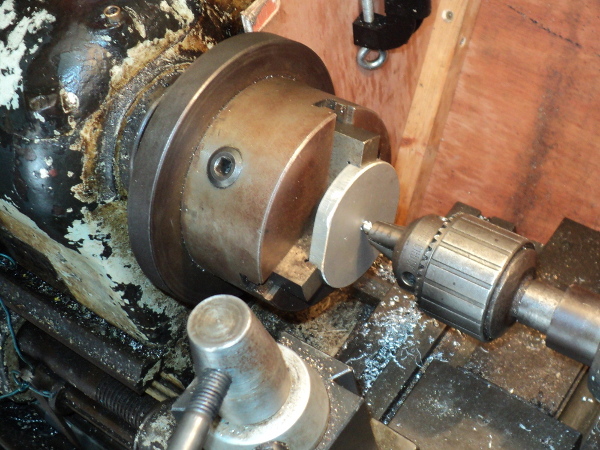
I now needed bases for the lights themselves. To make these I took a pair of 10mm thick alloy disks of about 85mm OD.

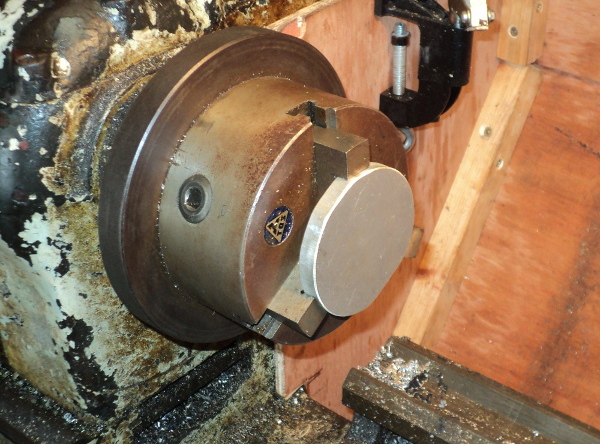
These were each chucked up in the lathe

raw disk

Raw disk in lathe chuck

and had a central 8mm hole drilled through.

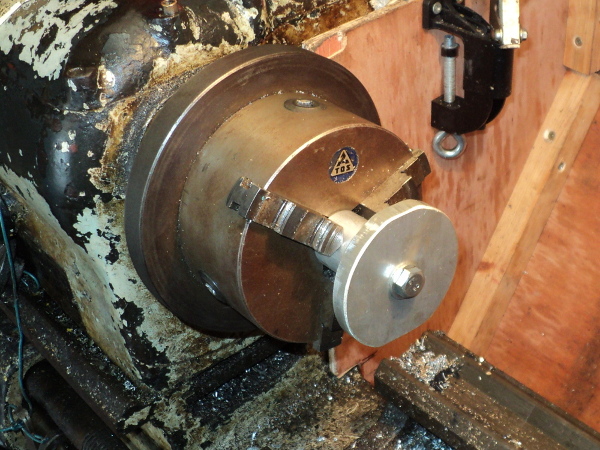
After this they were removed from the chuck their place was taken by a short length of 32mm OD bar. This had its end faced flat and then had a central hole drilled into it. This was tapped to take an 8mm bolt.

centrebdrilled

Disk centre drilled 8mm

This gave me a mandrel to work the disk on and so one of the disks was bolted to it, this meant that I could now turn the disk about it’s centre and it was able to have the edge turned down to size.

on mandrel

Disk mounted on mandrel for turning

This disk was now skimmed down to 75mm diameter, the same as the OD of the tube.

Next step was to turn a 4mm deep spigot on the disk to make a tight fit in the tube.

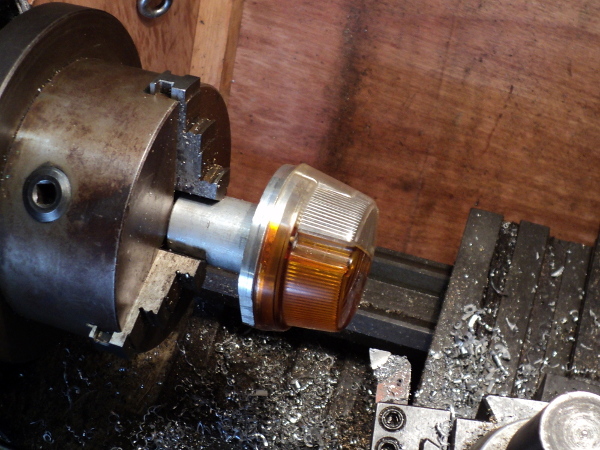
I then reversed the disk on the mandrel and another 4mm deep spigot turned on the other side, this time sized to mount the Hella lens onto.

finished turned disk

Disk turned to size and lens fitted

Suitable mounting holes were drilled and tapped into the alloy to take the lens mounting screws.

All that was now needed was to supply light to the lenses and rather than use incandescent  bulbs I opted to use LED lights instead.

Going onto Ebay, I ordered up 4 amber, two red and two white LED marker lights. These mount with a 10mm stud on their backs.

As these are the equivalent of a 10 watt bulb the intention was to use two amber LEDs to supply each indicator,one white for the front running light and two reds for the stop light.

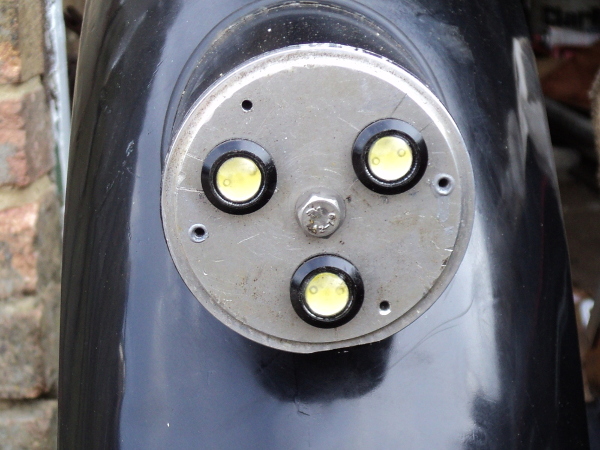
Going to the disks, I marked off the horizontal diameter through the lens mounting screws and drilled a pair of 10mm clearance holes above it. One one disk I then drilled a single 10mm clearance hole below the centre line and on the other a pair below the line.

drillee disk + LEDs

Front unit disk fitted with LEDs

Mounting two of the amber LED’s above the line gave me my indicators and the fitting the whites or reds below gave me my front running light and my stop light.

I needed a rear running light as well and so a similar but smaller unit was made up using a 50mm diameter LED rear marker light to supply the lens.

All that was left to do was give the mounts a lick of paint, mount them onto the guard via the central hole in the disks and to run in the wiring.

Finished job

The completed light unit in place


Lining it up

It’s now time to start fitting the sidecar. I’ve not yet refitted the tank after the dynamo belt drive conversion so now is an ideal time to do this.

First thing is to get the chassis connected up to the bikes frame.

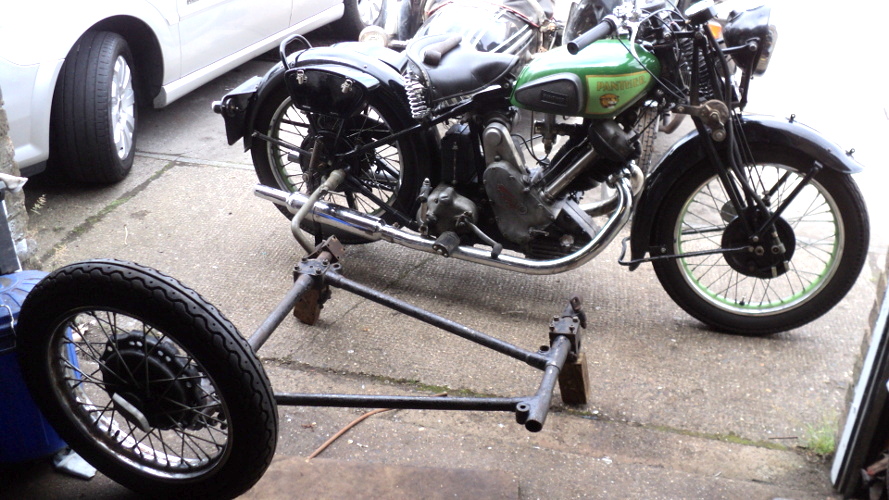
The chassis was laid out alongside the bike and put up on blocks.

The front swan-neck was put in position on the bike and loosely clamped to the sidecar chassis, as was the rear ball joint fitting.

Fitting a sidecar has been described as a black art, well now starts the black magic!

First thing to set is the lead, the sidecar wheel has to be set a bit in front of the bikes rear one, how much depends on the type of sidecar, the intended use and the bike itself.

A bike with rear suspension needs more lead than a rigid bike; with a heavy sidecar you needs less lead, with a light sports chair you need more. This all boils down to the answer to “How Much?”  being “It Depends” but it is not critical to a fraction of an inch, I’m starting with 6 inches of lead on a light sports sidecar and this can be adjusted, if needs be, after road test. On my later outfit, which does have rear springing, I’m running with 10 inches lead on a similar sidecar.

So the chassis was slid around on the blocks till I had the appropriate lead and the fitting clamps tightened a bit.
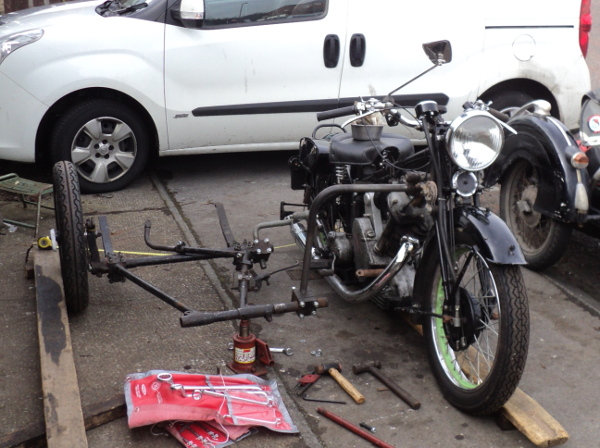
setting up

Lead and level have been set, now it’s the toe-in to do. Notice the two “fine alignment tools” by the front wheel

The chassis was now able to have the support blocks removed and, as the bike was now standing on her wheels as well, it was time to level the chassis.

Working with a rigid bike here it was set level side to side, when the bike has rear suspension you’ll need to have the bike loaded when setting this.

While you want the sidecar level side to side, going fore and aft you want it nose high, even when loaded, so the chassis needs setting with the nose rail between a half inch and an inch higher than the axle rail. Getting these right can be a bit fiddly as with the chassis I am using, adjusting the side to side level will also alter the lead if your not on top of the job.

Now comes the most important of the settings, the toe-in.

With a sidecar outfit, the power is all on the bike side, the sidecar wheel is unpowered.

This means that when running straight the sidecar wheel always drags a bit and tends to pull the bike towards it. It is not a heavy pull but it does get tiring compensating for it all the time, so the trick is to set the sidecar wheel to steer a little the other way by pointing it in towards the bike, to “toe it in”.

Thing is “By how much?” and the answer is “It all depends!”. This is the big variable and depends on the bike, the roads you use, road camber will affect it, how fast you are going etc. so you have to compromise and then make adjustments to suit.

Experience leads me to use an initial setting of around 3/4 of an inch over the length of the bike so a straight edge (here a length of 4 x 2 timber) is laid against the bikes wheels, I have the same size tyres fitted fore and aft so it’s set up on blocks and adjusted so as to touch evenly at four points across the wheels.

Similarly another straight edge is laid against the sidecar wheel, touching evenly against it and the distance between the two straight edges measured, first just behind the rear wheel and then just in front of the front one, the difference between the measurements giving the amount of toe-in.

This is adjusted to suit at the chassis clamps, the sidecar wheel being lifted off the ground and replaced and the straight edges reset before a check measurement is taken so as to remove any tyre distortion from the figure.

Once I had the required toe-in the two main sidecar clamps could be tightened up but this is another setting that will probably be modified after road test.

This left me with the sidecar lean out to set. The bike needs to lean a little way out from the sidecar. With a left-hand sidecar in UK you want the bike to be a little past vertical to allow for the road camber, so you drop a plumb line from the handlebar end and set the lean to around a half inch.
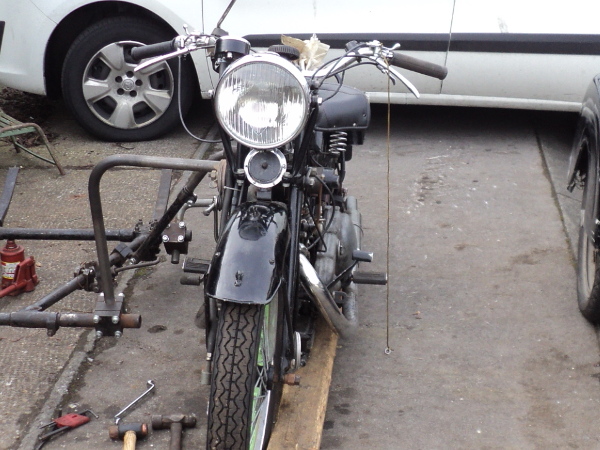
setting lean-out

To set the lean-out drop a plumb line from the handlebar.

I’ve got a right-hand sidecar however and any lean I set will be added to by the camber, if I set too much lean I’m going to feel the bike leaning over, so initially I’m setting so as to have the bike vertical on a level surface so on the road the camber will be giving the lean out.

This is set using the rear upper brace, that one goes to just below the saddle.
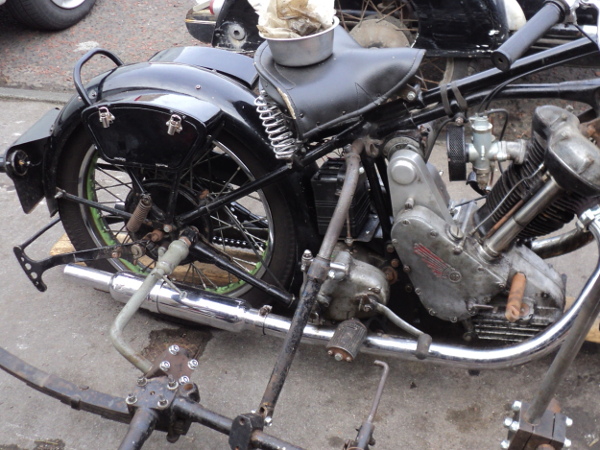
setting lean-out

Lean -out is set using the rear brace that goes to under the seat

That’s the main adjustments made and locked by tightening the chassis clamps. Some people will tell you these three fittings are all you need but a fourth one is definitely desirable, without it you can feel the outfit flexing in corners, not only that but the toe-in varies as the outfit flexes, Not Ideal!.

This fitting goes across between the front of the sidecar chassis and a low point on the bike to triangulate the swan neck. Normally you would take it off the front engine plates but a Panther does not have these.

However P&M supplied a mounting point on the engine right beside where the front engine supports are so its taken to there. All you do is adjust the fitting so that the clevis bolts slide easily into place and then lock it up in that position.
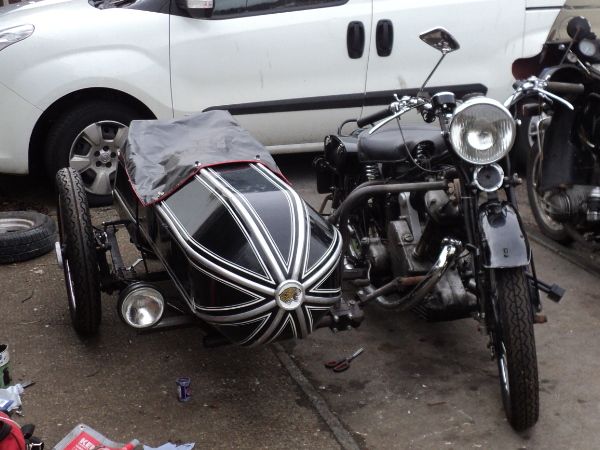
adding the body

The lower front brace goes between the front of the chassis and the bike.
Once it is in place then the body can be fitted.

With the basic settings made it now requires a road test to determine what adjustments need to be made to these.

What to expect is that as you pull away there will be a small degree of low speed steering wobble that disappears as soon as you are moving. This is normal and you soon do not even notice it, you don’t after all on your car and it does the same. You can reduce this with a steering damper, but too heavy a damper makes for heavy steering, careful attention to the setting up will minimise it, a better remedy.

Now try some slow turns, towards and away from the sidecar, ideally the effort should be about the same but if turning towards the chair is noticeably heavy then you need to reduce the lead to stop the wheel crabbing. But too little lead affects stability and makes the sidecar wheel more prone to lifting.

Does the outfit run straight under steady power? The ideal is to be able to hold it steady with one finger on the bars, does it pull to one side or the other? This is a pointer to the toe-in setting, pulling all the time towards the sidecar — increase the toe-in, pulling away from it — decrease the toe-in.

Open the gas and as you speed up you should pull a little round towards the sidecar; now shut the gas,as the bike slows on engine braking you should feel the sidecar pull round towards the bike.

If at steady speed you can feel it is pulling only slightly but enough to need constant input to stay straight then a SMALL adjustment to the lean-out can help but don’t overdo it, look on this as a final fine trim to getting the toe-in right.

So far all your tests should have been below 30mph, now it’s time to speed up a bit.

Take it gently and try at higher speeds, it may need a bit more fine tuning to get the outfit handling “Just So” but it’s well worth the effort as with a well set up outfit out on the open road it steers largely on the throttle, needing very little input to the bars.
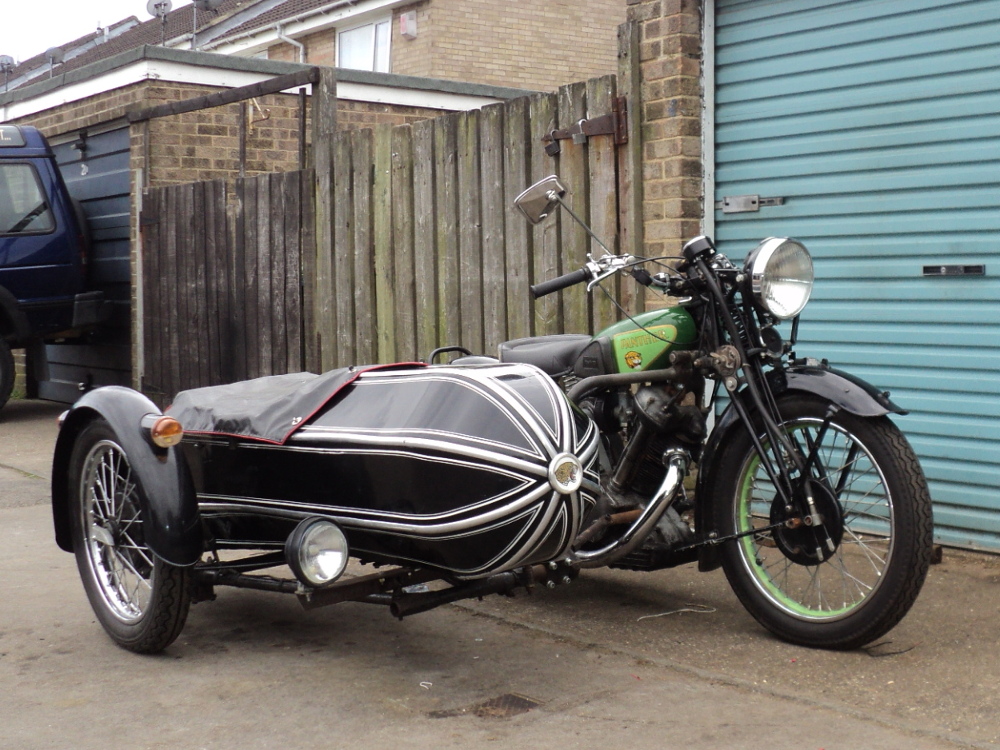
Complete outfit

Final Result, ready for the road
First Offering

It’s been quite a while since I’ve added anything to this blog, main reasons have been idleness on my part and having been out riding around on the Panther and her stablemates.

I’ve now begun another stage of the project and am prompted to make report.

It’s always been my intention to put a sidecar onto the Panther since doing so will allow me to take my dogs with me on the events that I take her on, as it is, when I go to an event  I have to either use the more modern BMW outfit or leave them behind which is not always convenient.

The sidecar I intend to fit is this Steib

Sidecar 2

As you can see it’s in nice condition

but when I offered it up to the Panther it was immediately obvious that they were not compatible.

Problem was that the Steib was on a chassis dedicated for use with a BMW, the major fittings were in fixed position with no adjustment possible and not only that but they presumed the presence of a front down-tube on the frame.

A problem here straight away because the Panther does not have such a tube!, it uses the engine as a stress bearing member in its place.

Anyway, what it meant was that with the rear fitting coupled in place the front one wanted to be through the timing chest on the engine and undoing the rear fitting and moving the chassis forward showed there was no-where for the front fitting to pick up to when it was moved far enough forwards to allow it to clear the timing chest.

So a change of plans, if the Steib chassis wouldn’t fit then I needed one that would fit, but that would also take the sidecar body.

I began a hunt for a suitable chassis and determined on a Watsonian VG21, a chassis of the same period as the Panther that would also take the Steib body.

Last time I wanted a chassis, everywhere I went I was tripping over VG21’s, but now I wanted one they had become like hens teeth!
I eventually tracked one down and work began.
First thing to do was to convert it to fit on the right hand side of the bike.

Reason for this is that both my other outfits (both BMW) have right-hand sidecars so having another one with a left-hand sidecar is asking for problems.

While doing this I found that the Silentbloc bush that the suspension arm runs on had been replaced with a solid steel bushing and the suspension locked up solid!

After removing this steel bush, and it did not want to be removed!!, I next had to source a replacement Silentbloc but I had a bit of luck here because I found someone who had the correct bush in stock.

So, conversion done and wheel fitted (I’ve not even looked at sorting out the sidecar brake yet!) it was time for the first attempt at offering up the chassis to the bike

At the moment I only have the rear main fitting sorted out so with this loosely fixed onto the sidecar it was connected to the bike and some wood blocks strategically placed.

A bit of shuffling it round and use of a tape measure and there it was in approximate position against the bike.


Sidecar chasssis

First offering up

I was now able to get some other measurements I needed then it was all again dis-assembled.

Main purpose was to check the feasibility of a right hand chair on the old lady, I was fairly sure it would be ok as there is a proper rear mount point for a sidecar at the offside rear , and to get the dimensions for having a swan-neck made up for the job.

This will be a simple piece of pipe-bending, a length of 1¼ inch OD heavy-wall steel tube with a 90 degree bend in the middle, simple to make if you have the facilities, but I don’t so it has to be farmed out.

Back Up

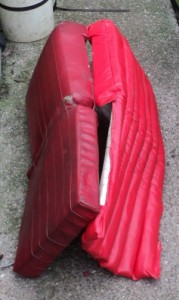
When I first made this sidecar I had a seat made for it, this seat is not really satisfactory but when I tried to have one made up properly I was told it could not be done at reasonable price, reason given was “No-one does it like that now-a-days”, which is why I’ve now made up a new one myself.

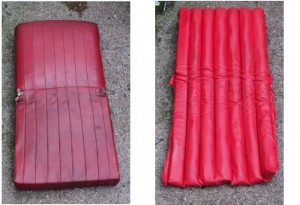
2 seats

The two seats, commercial one on the left.

As you can see the “professional seat” has been made by simply taking two blocks of foam and putting a cover on them and has a much thicker apron than the one I made, which is copied from an original Steib seat, the “bought in” looks like something you’d find on a bus!. This extra thickness reduced the knee clearance inside the cockpit and also made it a bit more difficult to get into and out  of the sidecar. As the apron lies on top of a set of tension springs set into the cockpit floor it does not need to be as thick as this hence the thinner apron on the genuine Steib seats.

Seat "aprons" compared.

Seat “aprons” compared.

First thing in making up the new seat was sorting out materials.

What’s needed is a new back-board, foam padding and covering materials.

The seat has a wooden back that hooks over a tongue on the top of the rear bulkhead of the cockpit and at the bottom is shaped to fit into the octagonal body.
seat back

This is the tongue the seat locates over

Onto this board is fixed a block of upholstery foam which is covered and held in place with heavy calico and over this goes the reeded top-cover with lower “apron” that goes on top of the support springs.

Under the seat

The springs that support the “apron”

On looking round the ‘net I found “Woolies” from whom I could source the foam and covering materials and I went down to the local DIY shop for some 12mm plywood from which to make the backboard.

I ordered up some 50mm and some 38mm foam along with the red vinyl covering material and calico.

To stitch the covering together I used an old-fashioned “Singer” hand-cranked sewing machine  fitted with a needle intended for sewing leather.

A modern electric machine baulks at sewing the multiple thicknesses of the materials I’m using.

The foam was supplied as a rectangular block and had to be cut to shape, this was easily done using an electric carving knife, bought as a special offer and afterwards donated to the kitchen.

First thing was to make up the backboard

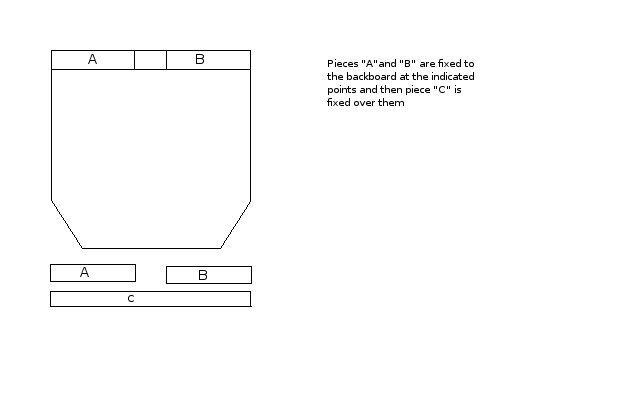
The flat main board has a top “overlap” that is made up from another three pieces of plywood fixed to this board to allow it to locate over the tongue on the seat bulkhead.

Backboard

Backboard

The two pieces “A” and “B” were glued and screwed to the top of the backboard as in the sketch and then the long piece “C” glued and screwed on top of those.

The piece of 50mm foam was cut to fit onto the side of the backboard away from the overlap and then glued onto the board with PVA glue.

The foam was then covered with a piece of the calico which was taken round onto the back of the board and fixed there, PVA glue again and a staple gun used to secure it.

To be continued:-

A Bit On The Side

The big Panthers are best known as sidecar bikes, back in the 1950’s and 1960’s it was very rare to see one being ridden solo, they normally were seen hitched to a big saloon sidecar such as a Busmar or a Carmobile and they were in fact normally sold as an outfit.

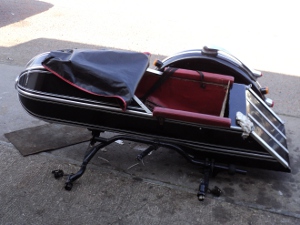
I intend to run mine both as a solo and with a sidecar so I need a sidecar and rather than a big saloon chair I’ve a nice little open sports job that’s based on the Steib S350.

Sidecar 1

This is a copy of an S350 Steib on an LS200 chassis

Sidecar 2

It’s in quite nice condition but is a right-hooker.

As you can see it’s not in bad condition but a new seat is required. There is one with it but while it is usable it is too bulky and is a poor copy of the original.

A problem is going to come up with fitting it because as you can see it is meant for fitting on the right side of the bike while in UK a sidecar is normally fitted on the left.

The sidecar is mounted on a Steib LS200 chassis which uses the German DIN standard sidecar fittings and it will mean sourcing a set of bike-side fittings to suit and will probably need a sub-frame to pick-up to that front mounting-point on the chassis.

Besides that the DIN fittings have the beauty that using them means that you have a sidecar that is both quick and easy to remove from the bike, not only that but you do not lose the sidecar alignment settings when you remove it, so when refitting the sidecar you do not need to re-align it.

However, a disadvantage of the LS200 chassis is that it only has a three-point mounting.

While this is adequate for on the smaller bikes (sub-350ccs) that the LS200 was intended for, on a more powerful machine it is better to have the more rigid four-point mounting and it will be necessary to arrange for this.

So, – –   Why fit a sidecar?.

Well it means that I can take the bairns with me when I go on events, it gives me extra carrying capacity for luggage and so on, and quite simply, I like them.

Riding a sidecar is totally different to riding a solo, it means learning a new and totally different set of skills but once you can handle an outfit they are great fun to ride, not only that they are great attention getters.